
WELCOME TO THE SHOP

KRAFKA KRAFT INC.
I’ve had access to a shop nearly my entire life. It all started on the garage bench of my childhood home with a project goal, some hand tools, and determination . It has since morphed throughout the years through multiple shops, with many specialized tools, and different mediums, allowing me to craft continually advancing skill sets and products. I’ve had the fortunate pleasure of working in many shops throughout my young life and even the experience of setting up a number of shops for myself. I am currently in my third shop iteration now and couldn’t be more shop proud! If you’re like me and you find yourself in a shop a lot, here are some helpful tips I’ve incorporated into the the foundation of Krafka Kraft Inc.
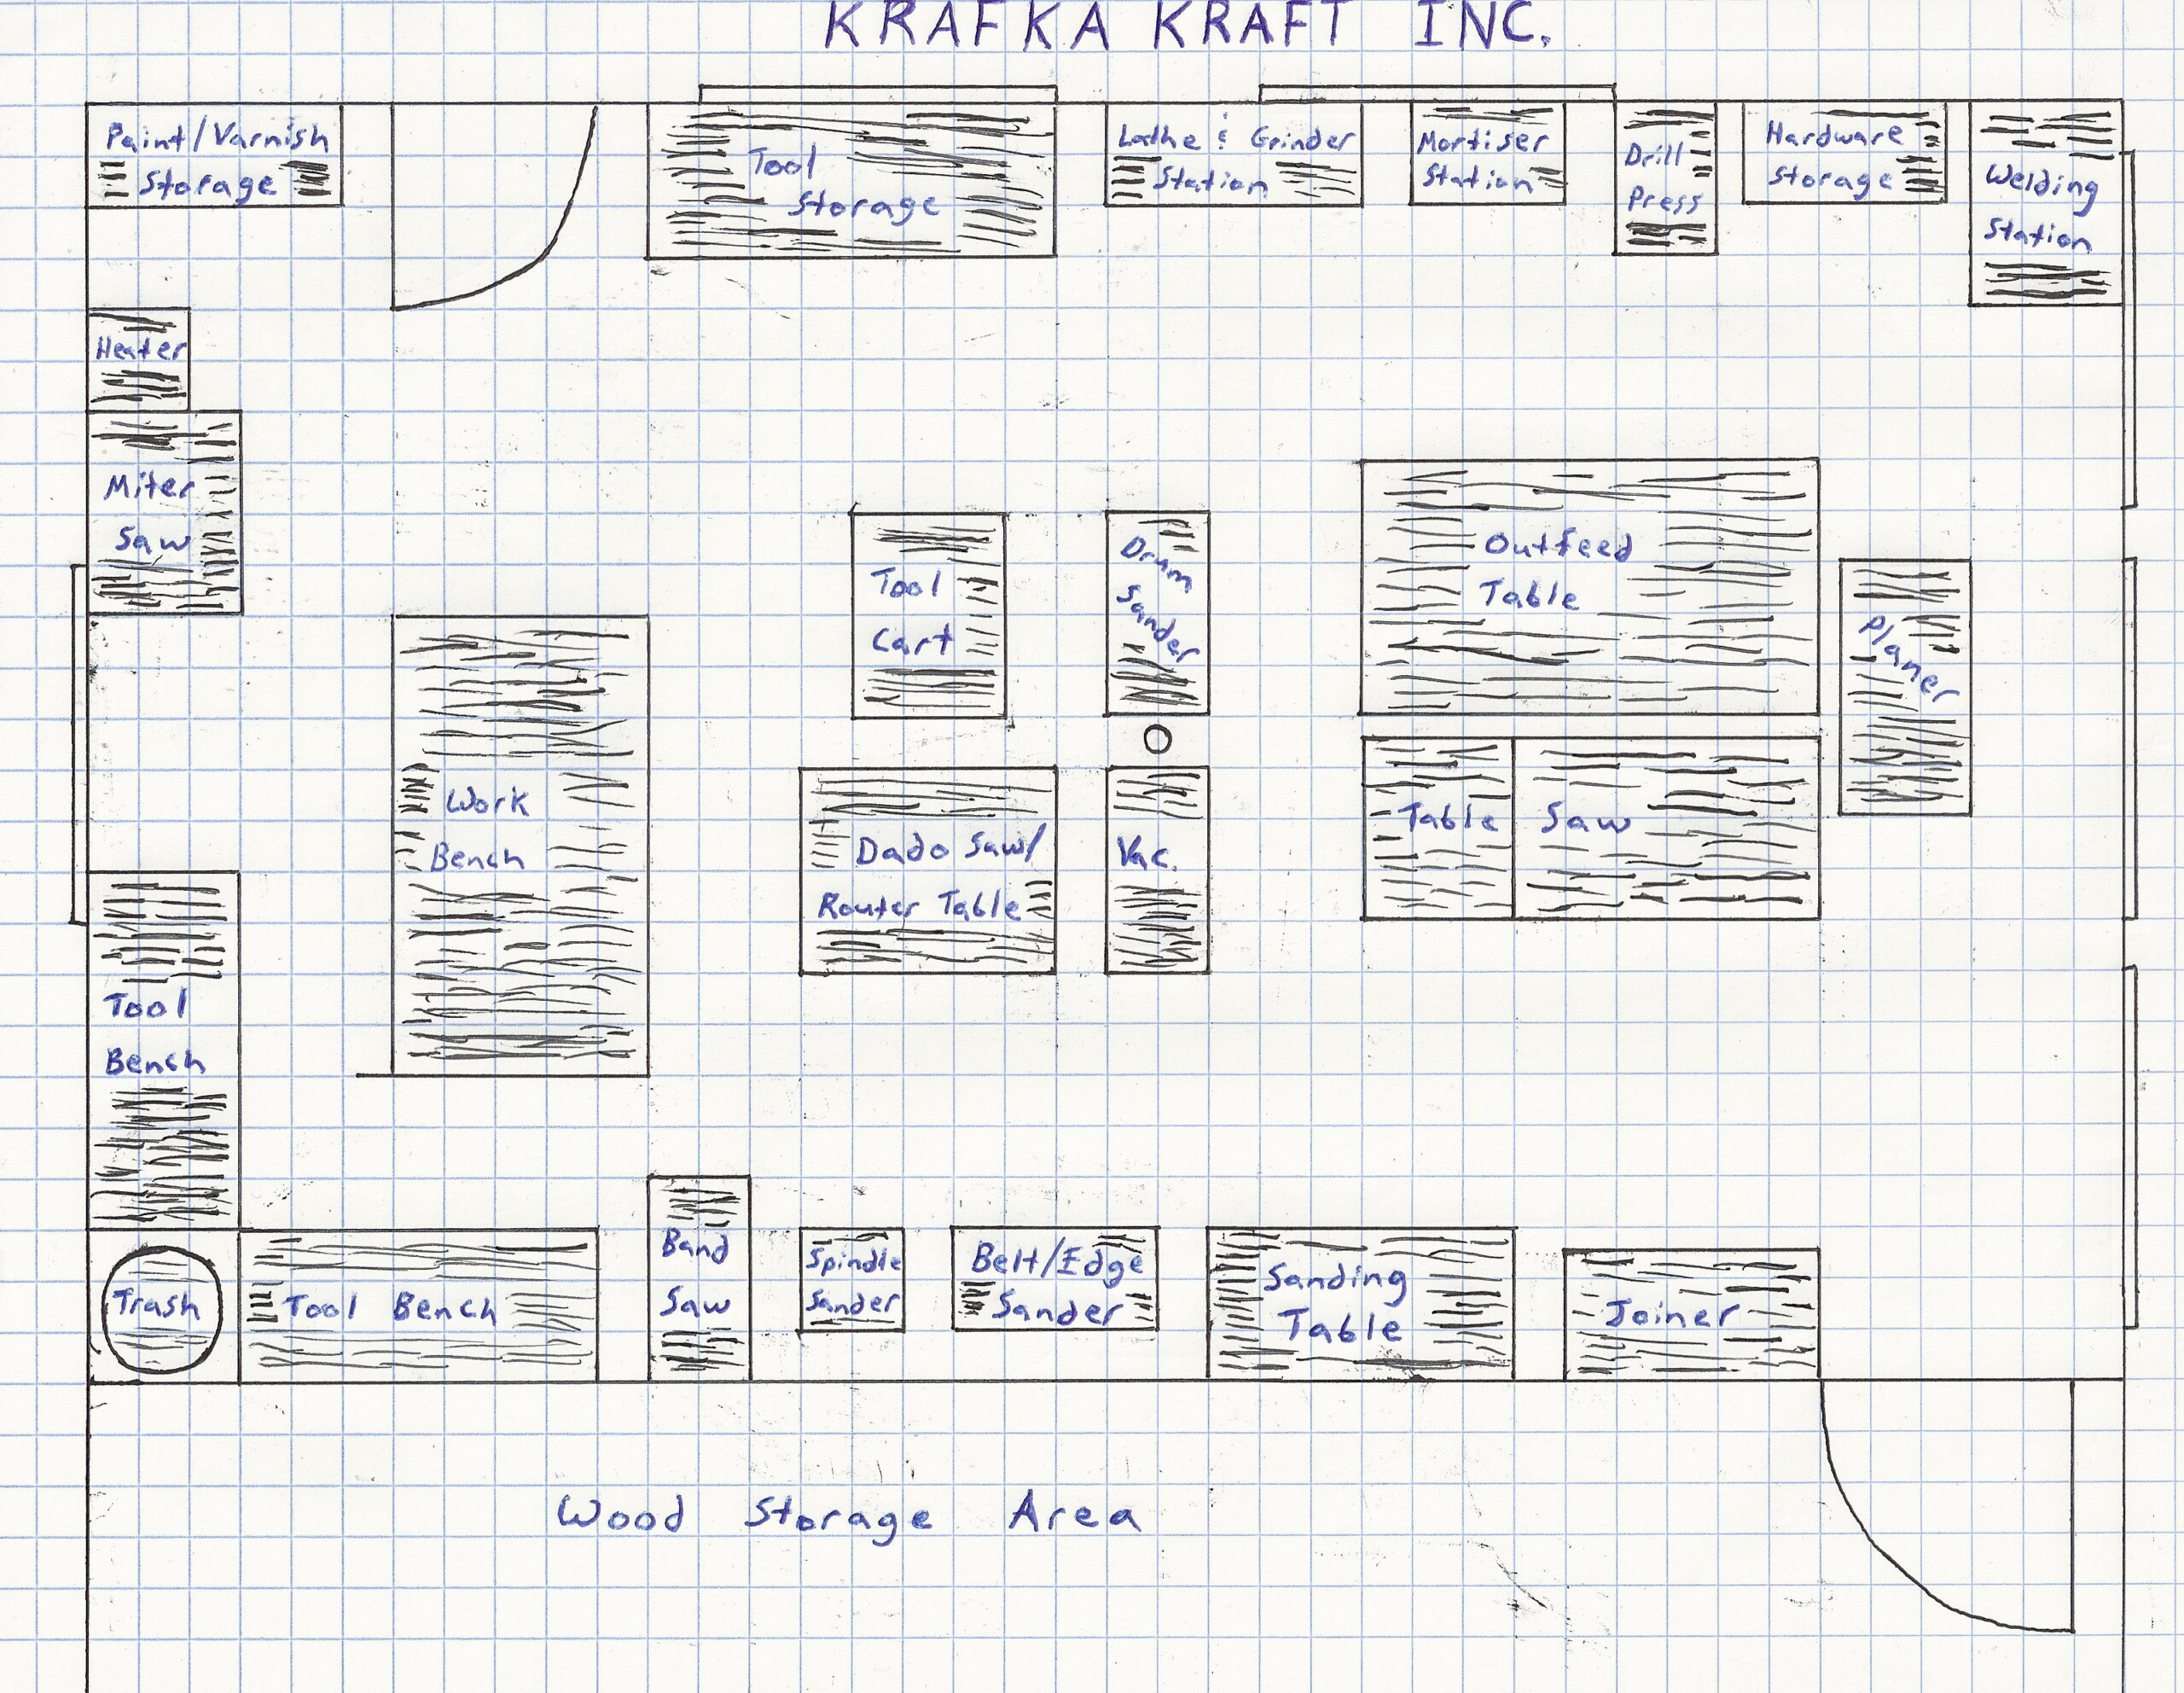
- GO WITH THE FLOW: Ever try swimming up steam? It’s hard, and so is running around your shop or place of work all day trying to get stuff done. I designed my shop so the work flow is natural. I get my wood from the storage racks and there in front of me is my planer and table saw. If it needs cut to length or width, I do, I then plane it to thickness. Two steps behind me is the joiner, for seamless edging. Another two step away is the table saw for exact dimensional cuts. To end mere feet away are my sanding machines.
A planer, a table saw, a joiner, and various sanders are essential to an efficient wood shop. They get used most frequently, most consecutively, and notably they create the most saw dust. Thus, I have put them as close together as possible.
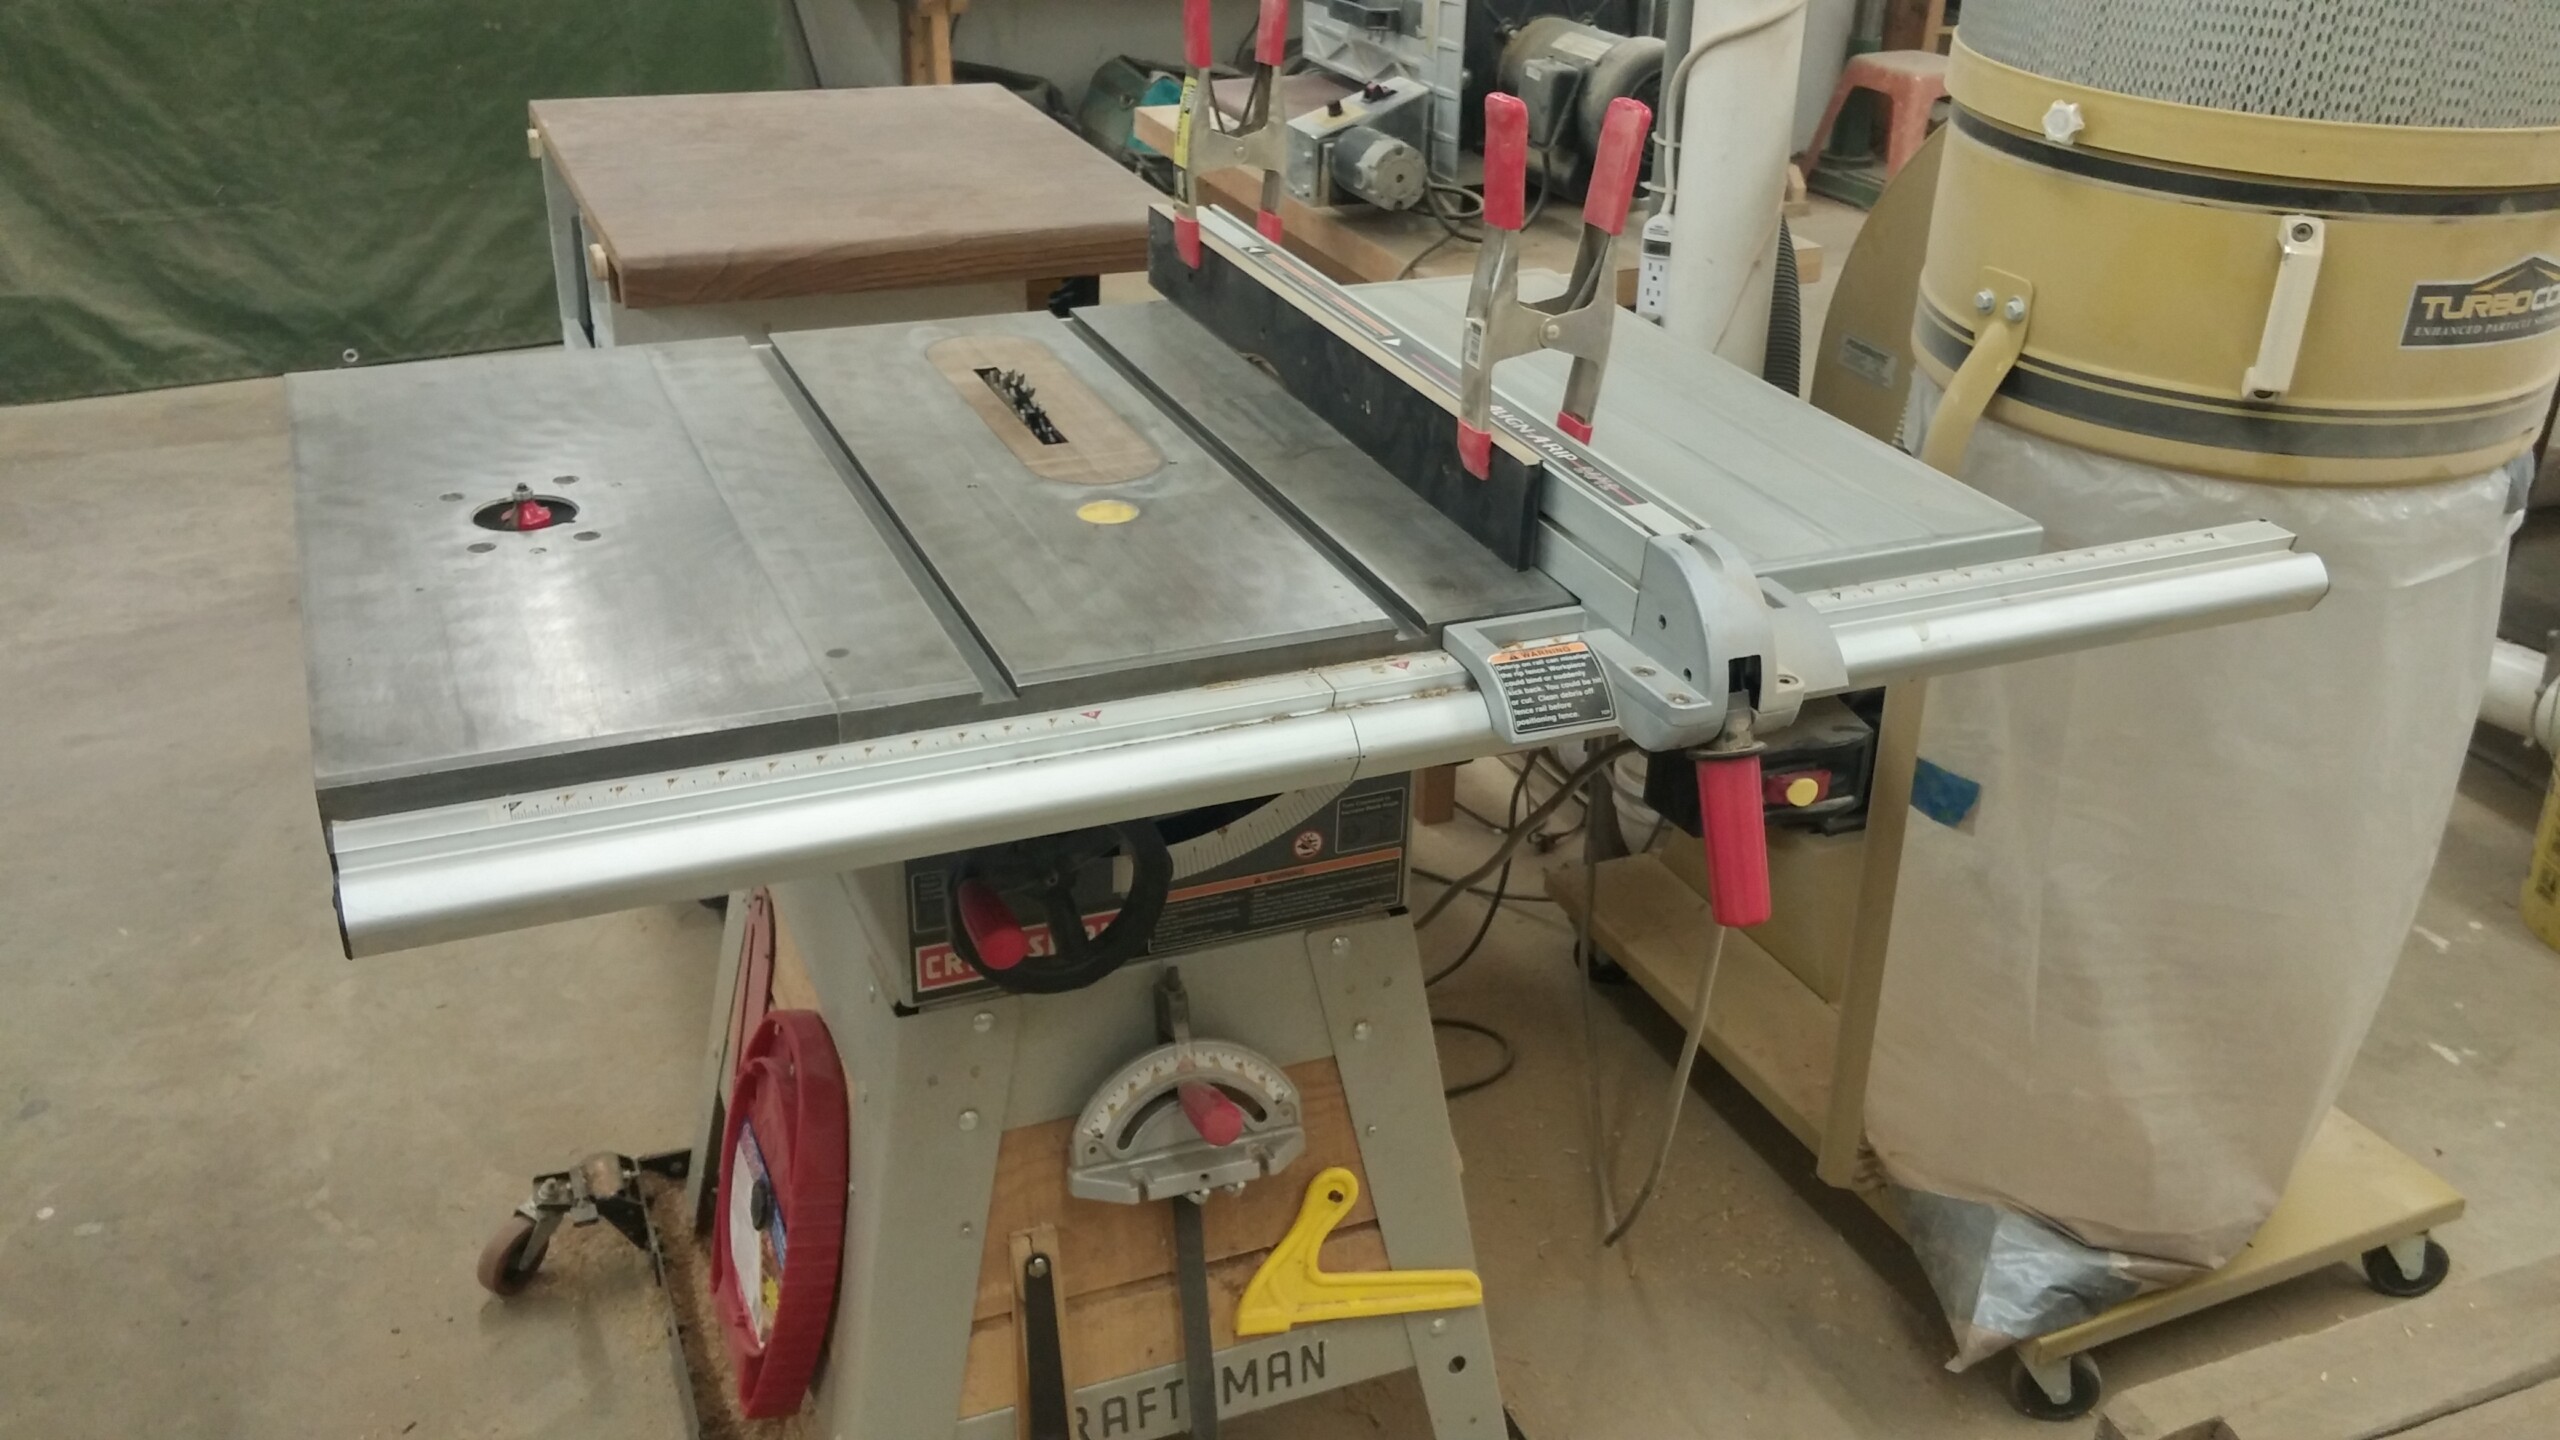
- GET A SECOND (INEXPENSIVE) TABLE SAW AND USE IT AS A DADO SAW: As a woodworker I make a lot of joints. Specifically a lot of mortise and tenon, rabbet, and dado joints. I found myself swapping my table saw blade for my dado blades quite frequently. As you may well know this process entails:
- Unplugging the saw
- Finding the arbor wrench and a scrap stick of wood
- Removing the zero clearance table insert
- Unscrewing the nut and removing the washer
- Dropping out and temporarily storing the saw blade
- Putting the dado blades on in correct order and thickness
- Putting the washer and nut back on (if you didn’t lose them already in the abyss at the bottom of the cabinet!)
- Finding the dado insert and inserting it
- Affixing a sacrificial fence if needed
- Getting the depth and width of the cut adjusted just right
- Lining up your piece of wood and turning on the saw… click… Did you remember to plug it back in?!?!
So instead, I got a relatively inexpensive contractors saw (mine doubles as a router table) and have been using it for all my dado cutting needs. It has been a real game changer!
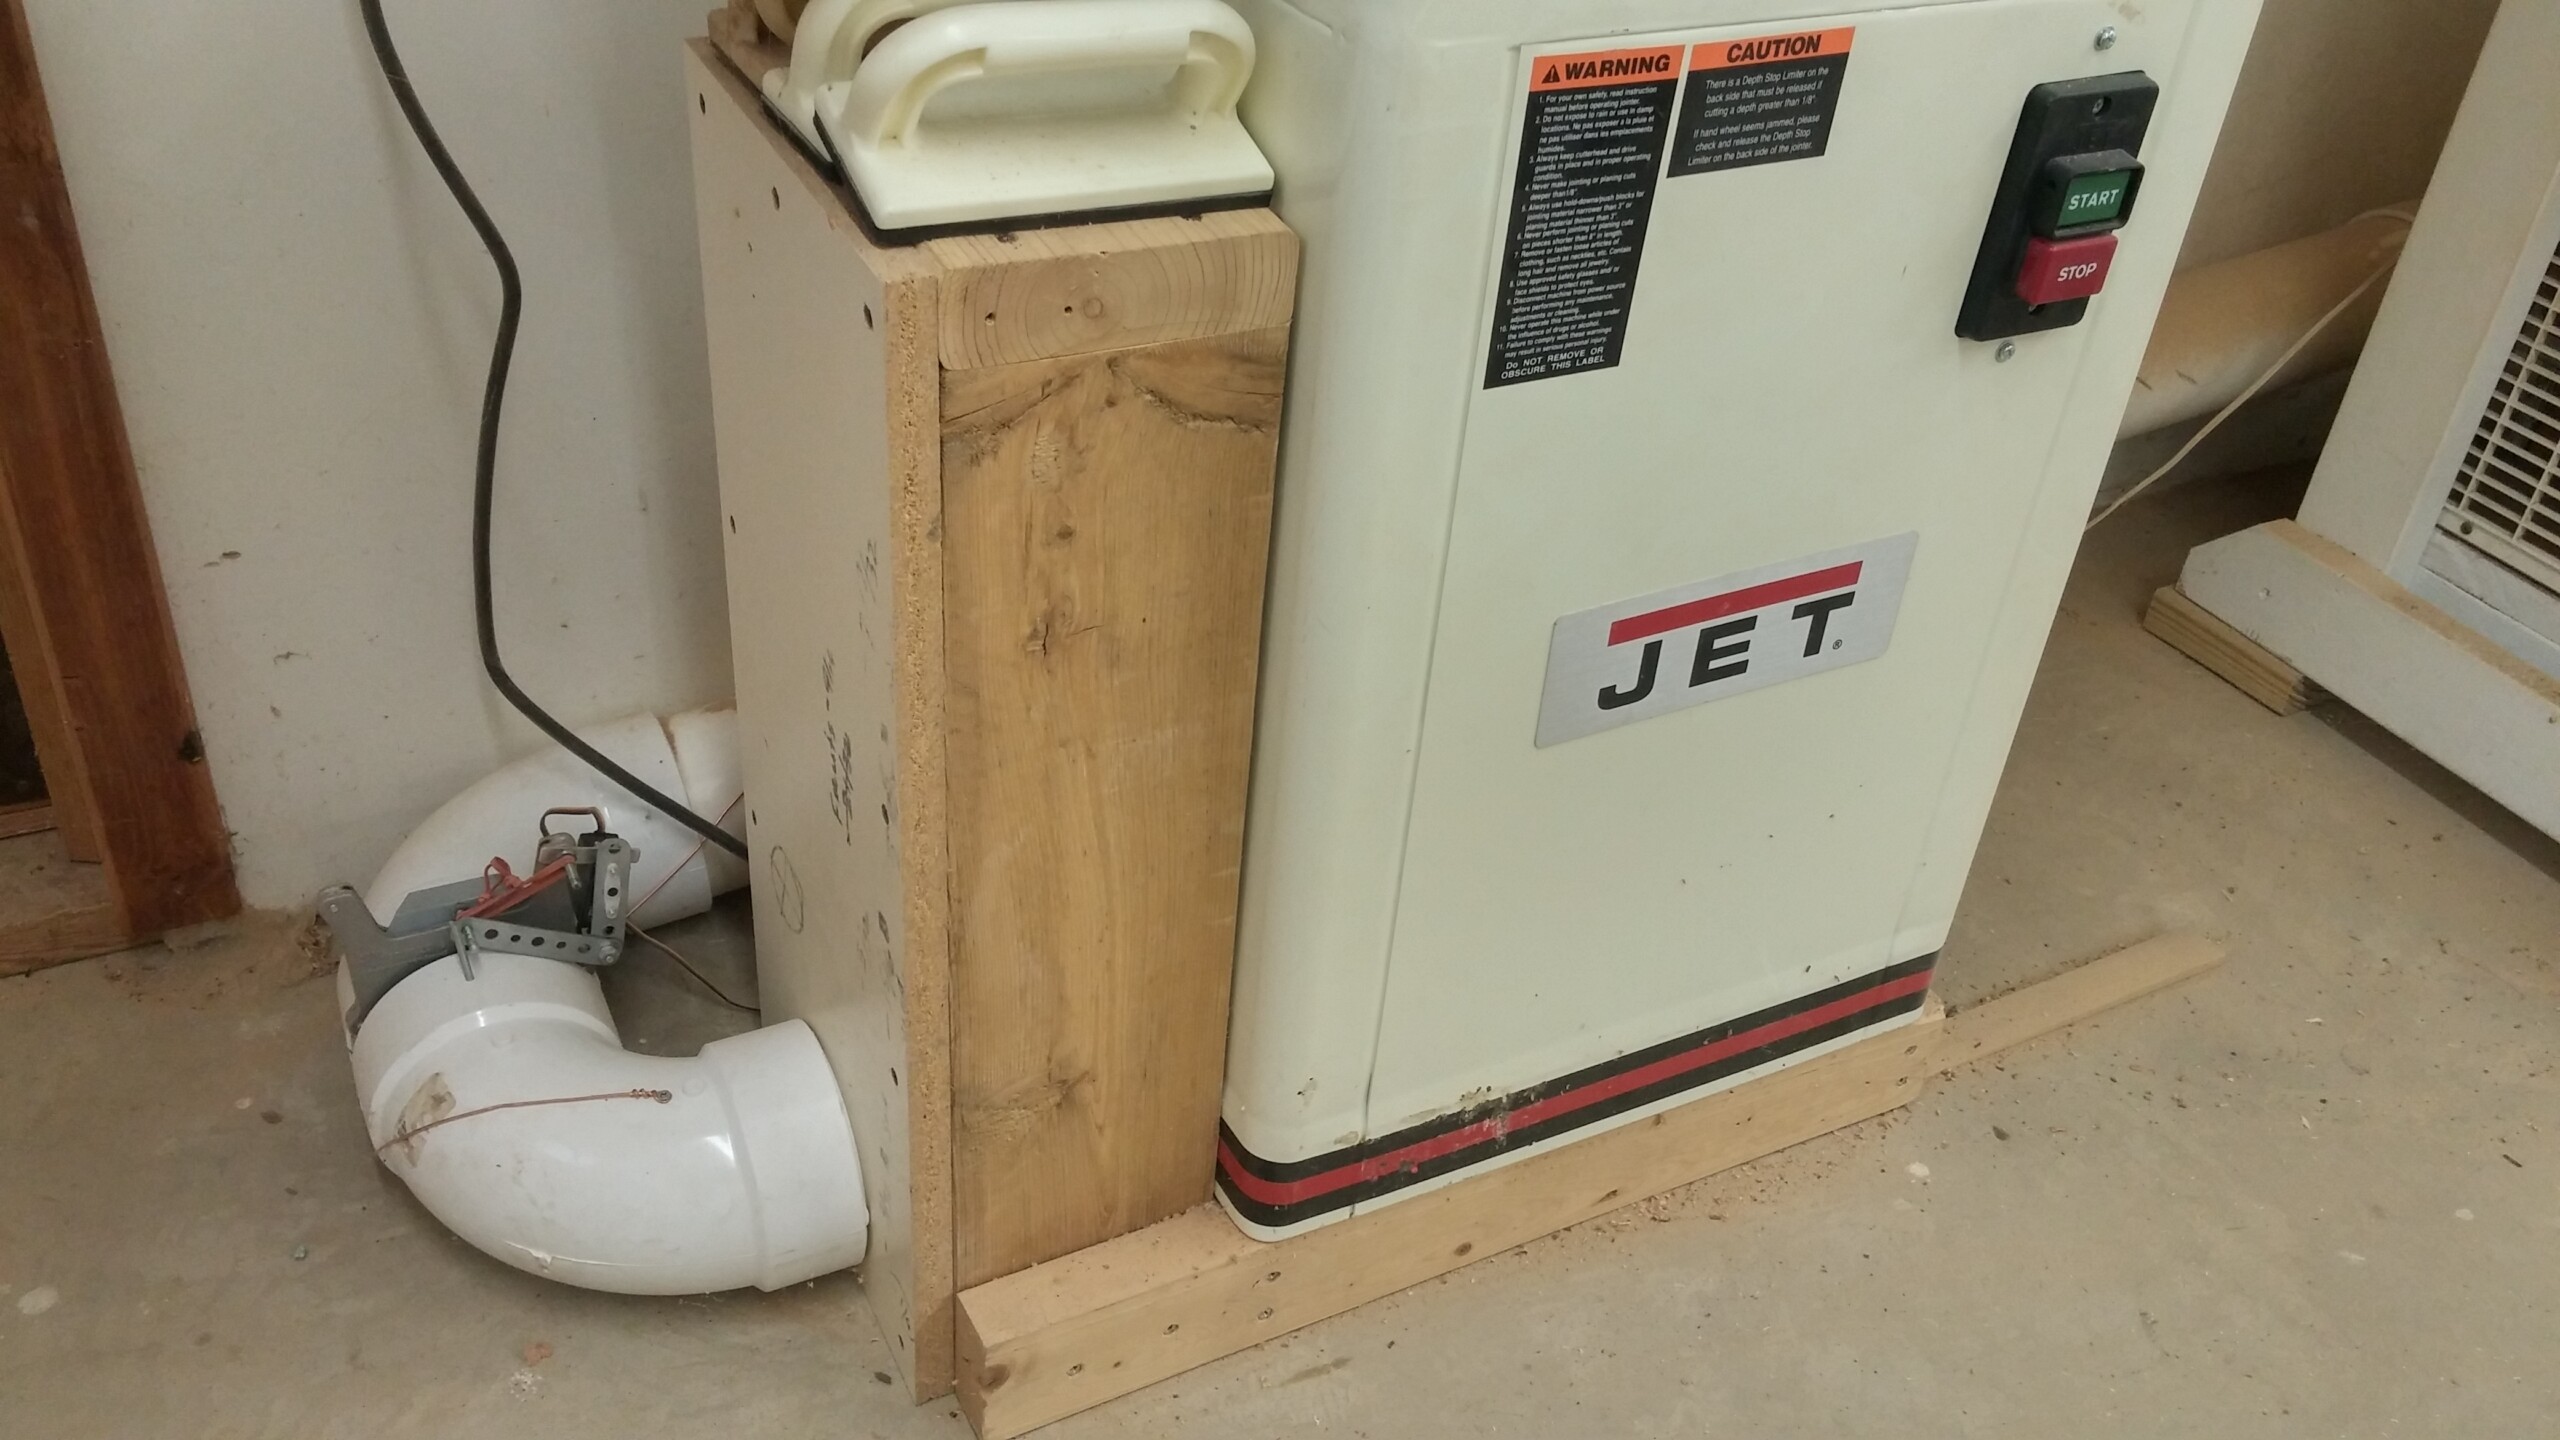
- AUTOMATIC DUST CONTROL SYSTEM: I hate running around opening and closing blast gates, turning on and off the vacuum even with my remote control. So I decided it would be nice to have an automatic system that did all of these things for me at the flick of my machine switches. I knew a little bit about integrated electronics from my engineering days and decided to make my own system from scratch. So I installed on each of my dusted machines and the vacuum electronics to detect current in the line, servos to open and close the blast gates, and radio transmitters/receivers to tell the vacuum when to turn on/off.
As with most electronics projects, I had to work out a lot of bugs. But eventually it payed off and I have a fully autonomous dust collecting system. I simply turn on a machine, the blast gate opens, and the vacuum turns on. When the machine is switched off, the vacuum turns off, and the blast gate closes!
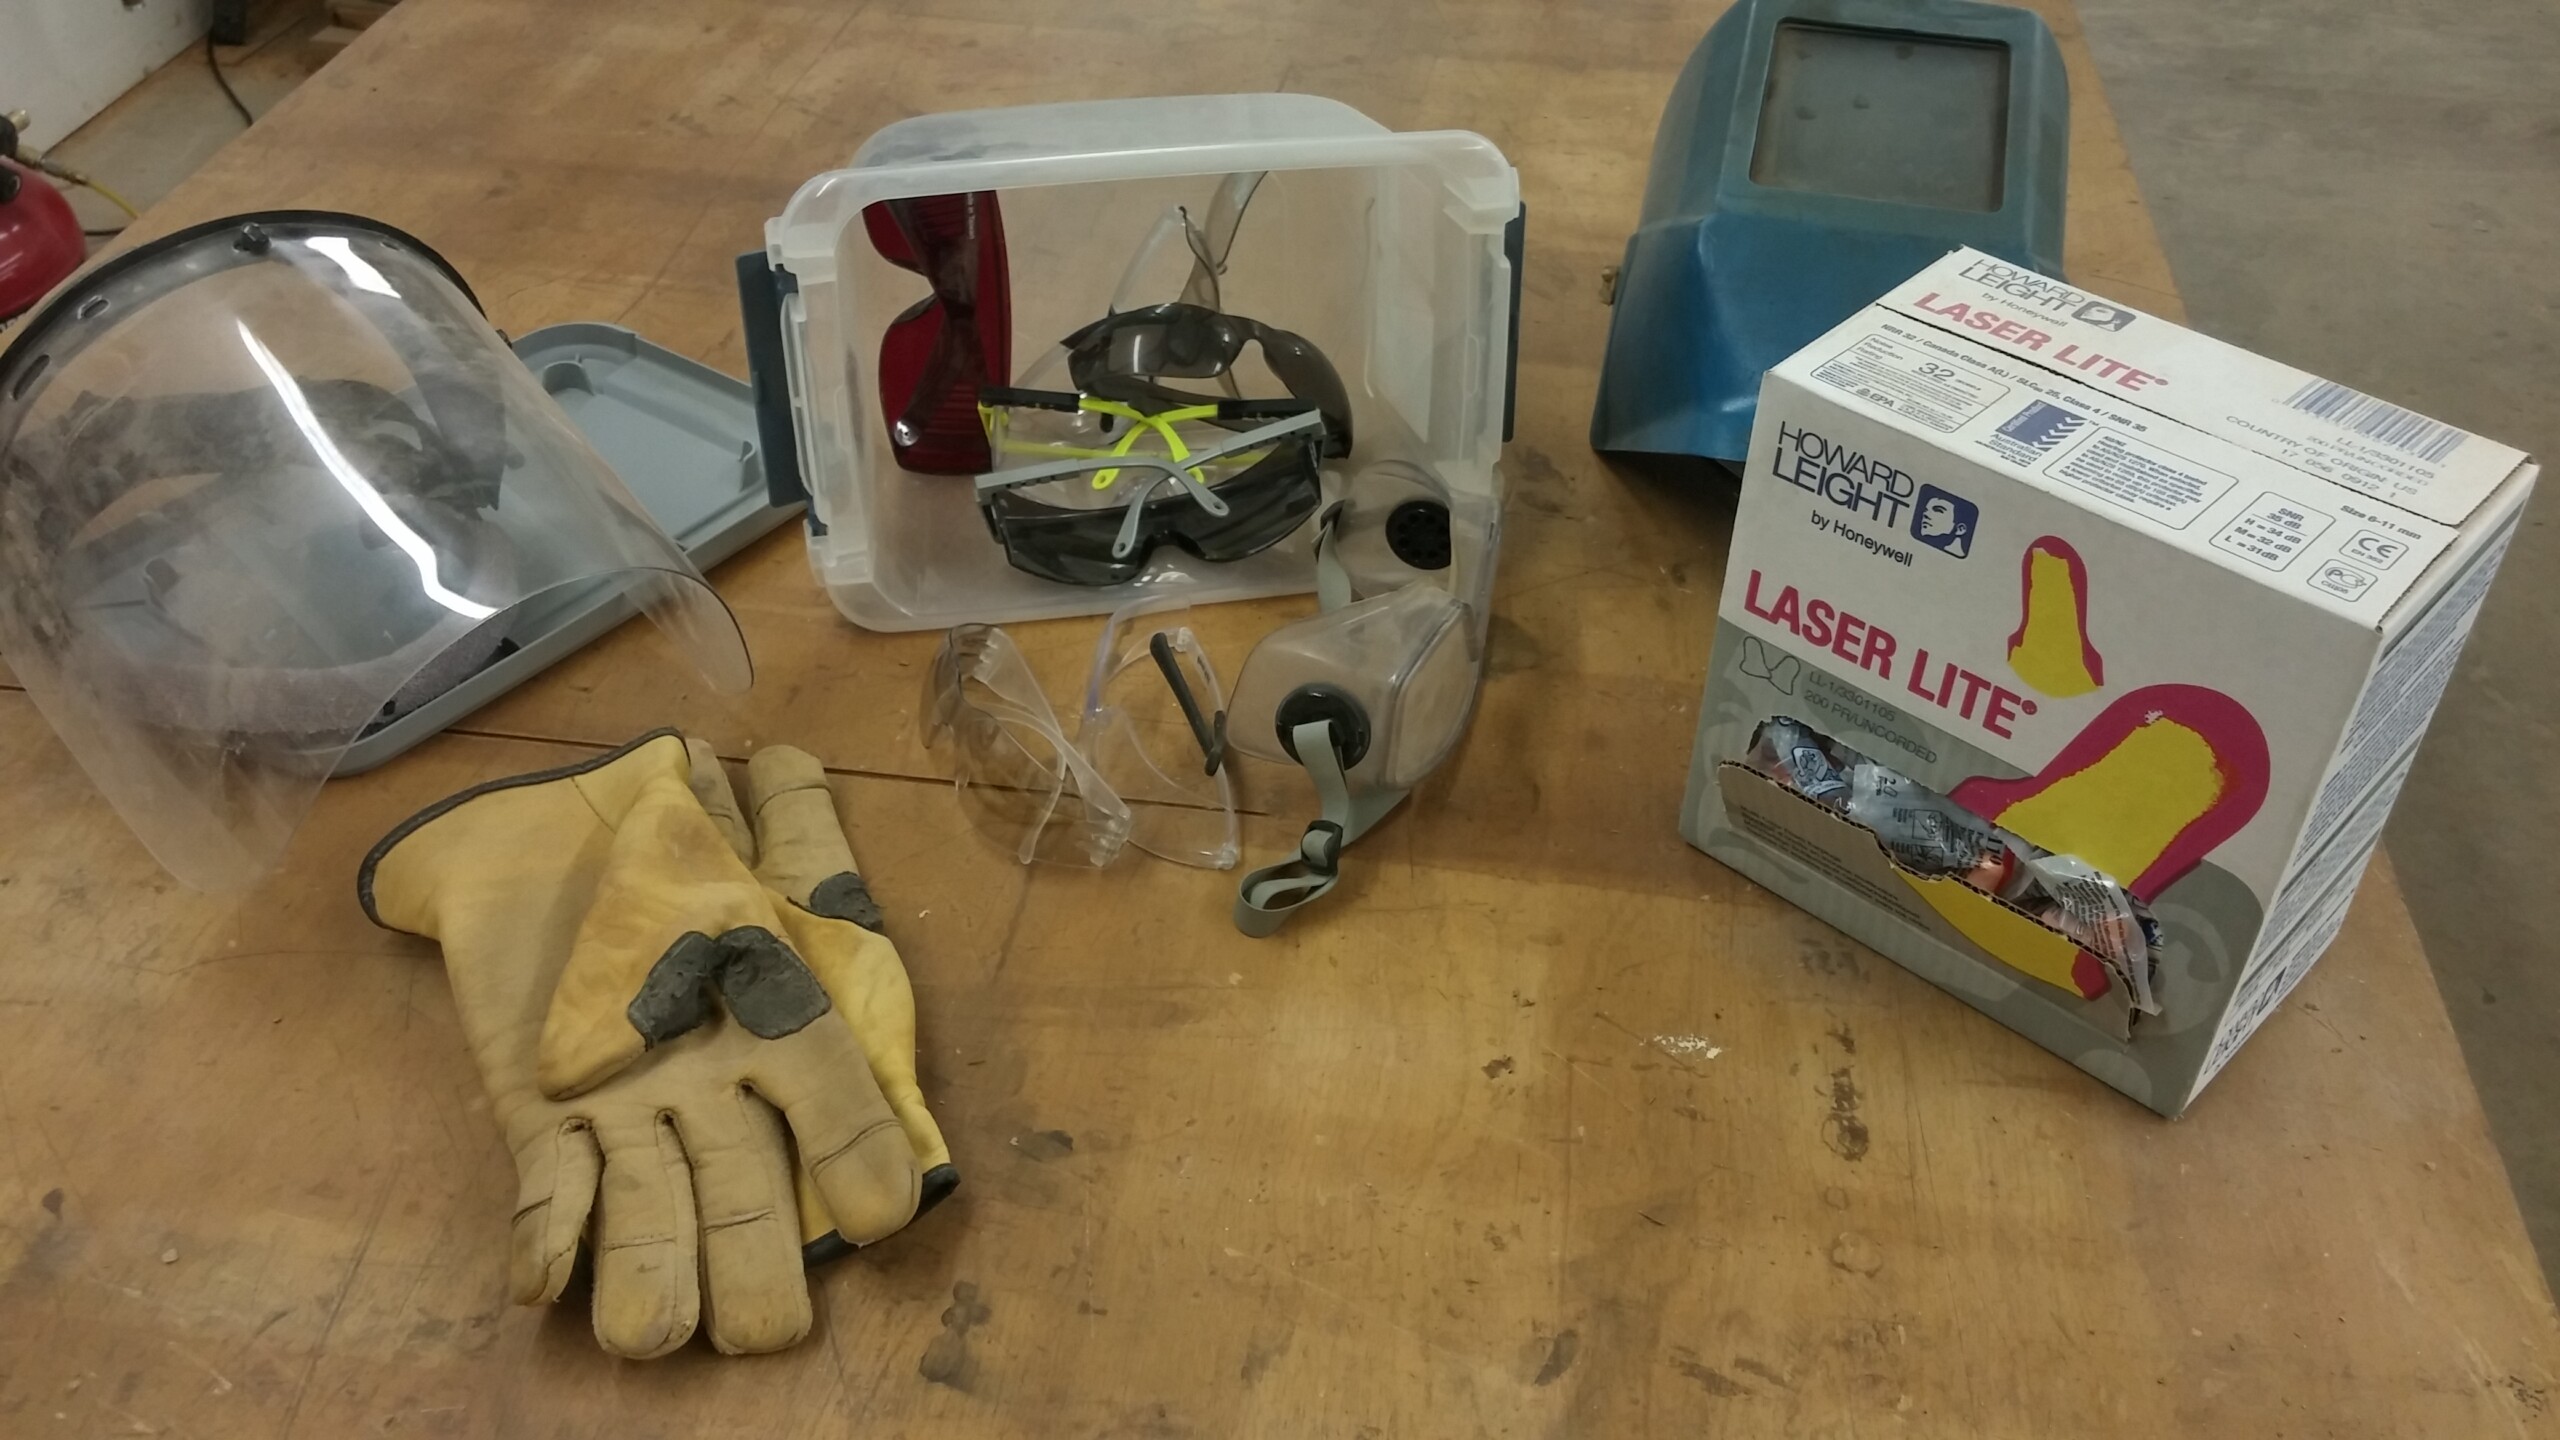
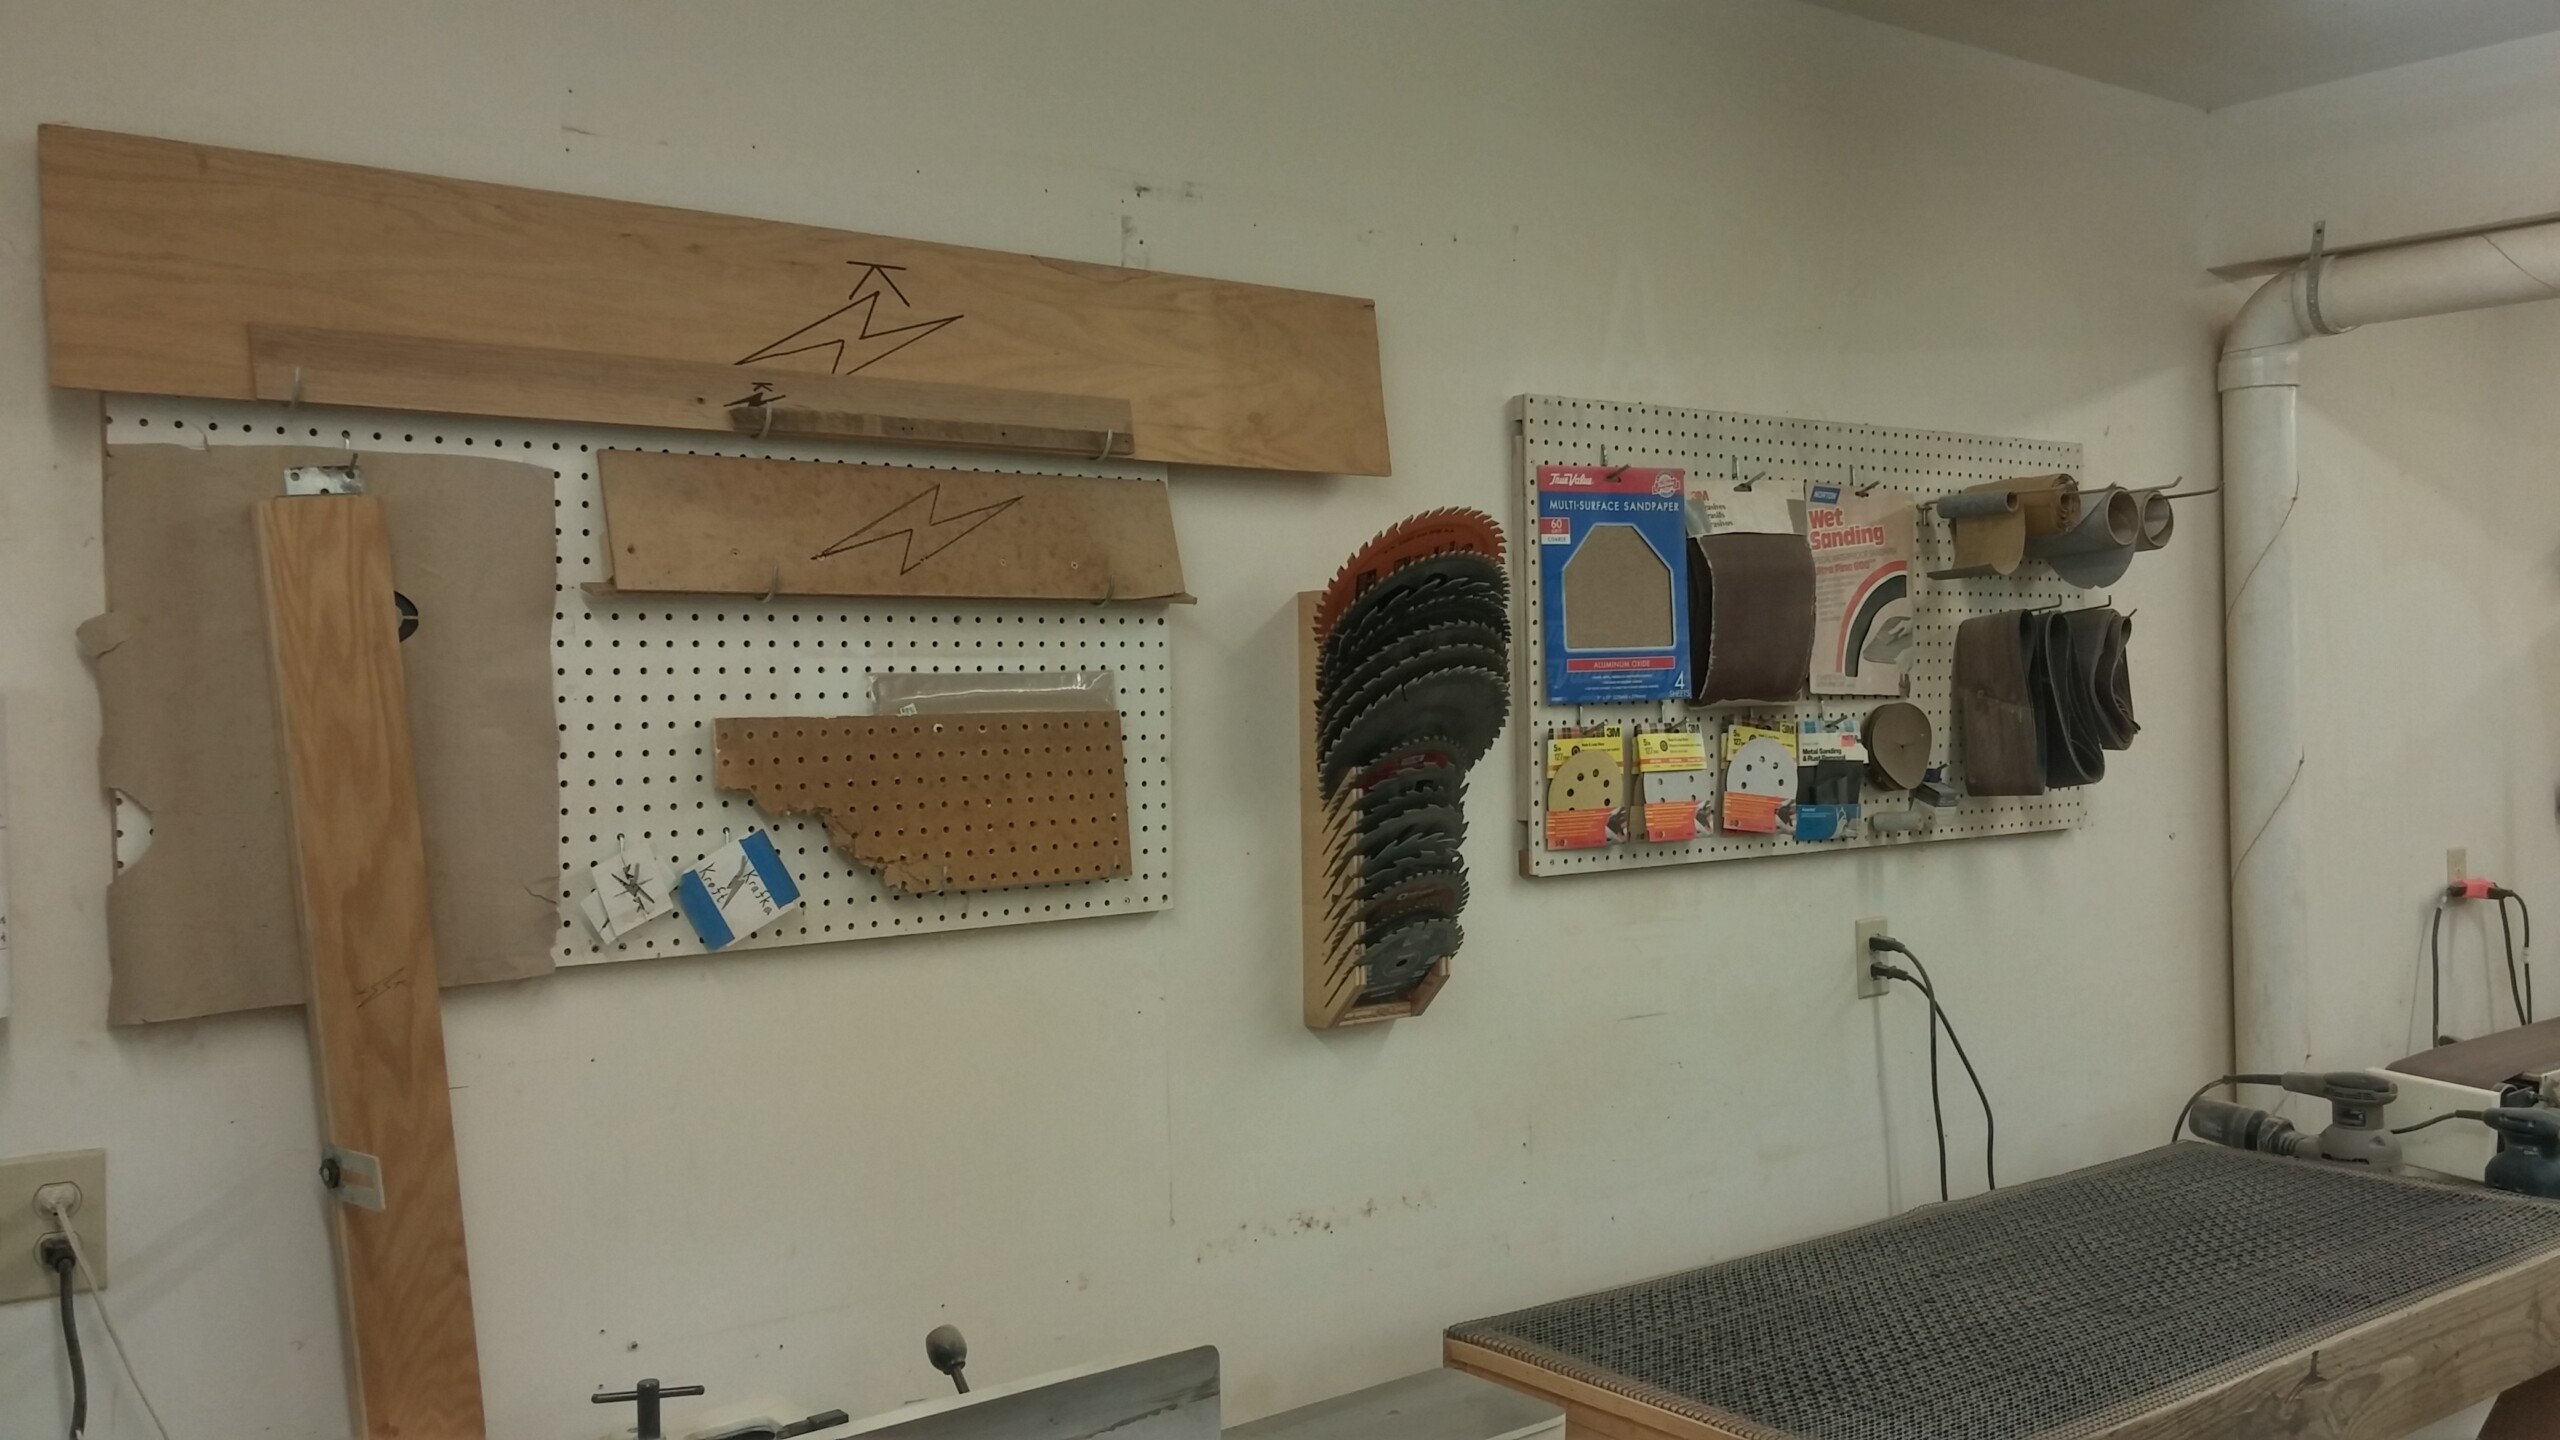
- HAVE ALL YOUR TOOLS HANDY: I don’t have cabinets, I don’t have drawers, I don’t even have a tool box. All my tools are readily accessible at a moments notice. This is made possible with multiple peg boards around the shop conveniently displaying my tools, jigs, and materials where I need them. Around my sanding stations is a peg board displaying various styles and grits of sand paper and sanding belts. Above my joiner I store useful jigs and templates. I have a saw blade index on the wall close to my table saw keeping them protected and accessible.
I keep the vast majority of my tools on peg boards around my primary work benches. These boards hold my hammers, chisels, saws, rulers, squares, screwdrivers, wrenches, pliers, etc… Pretty much my entire collection of hand tools are neatly displayed on these two boards, ready to be used right when I need them.
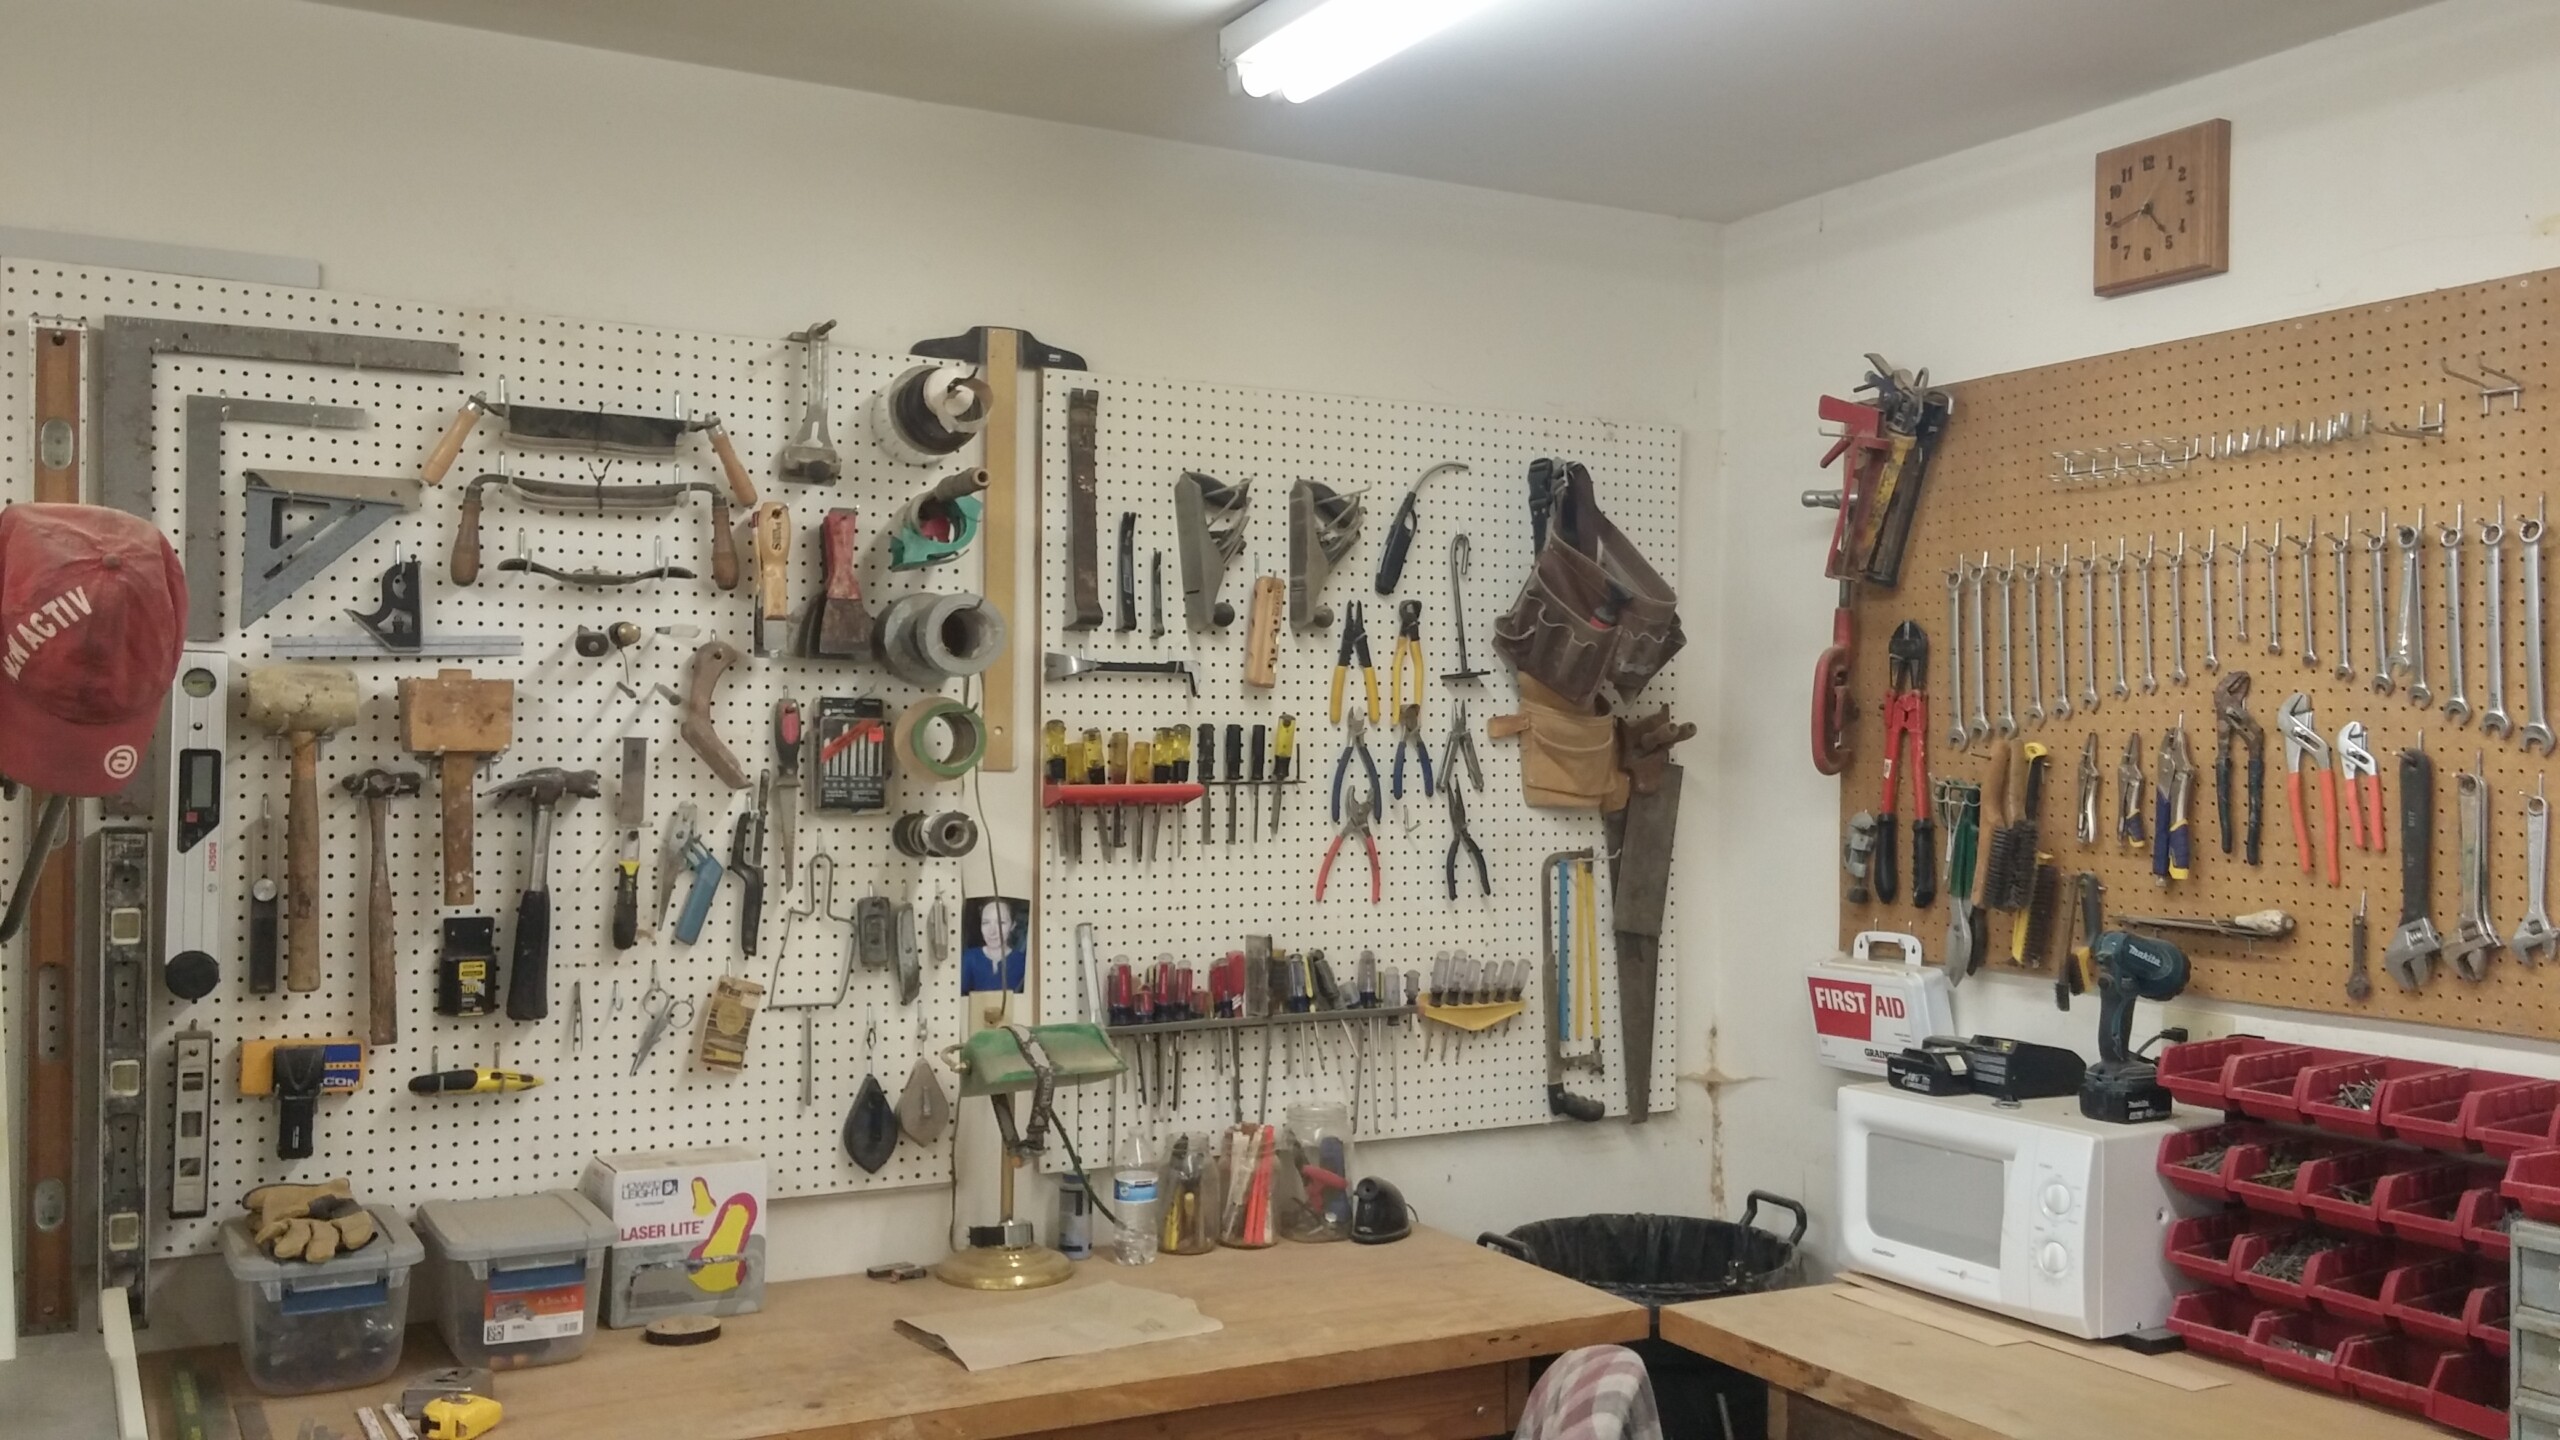
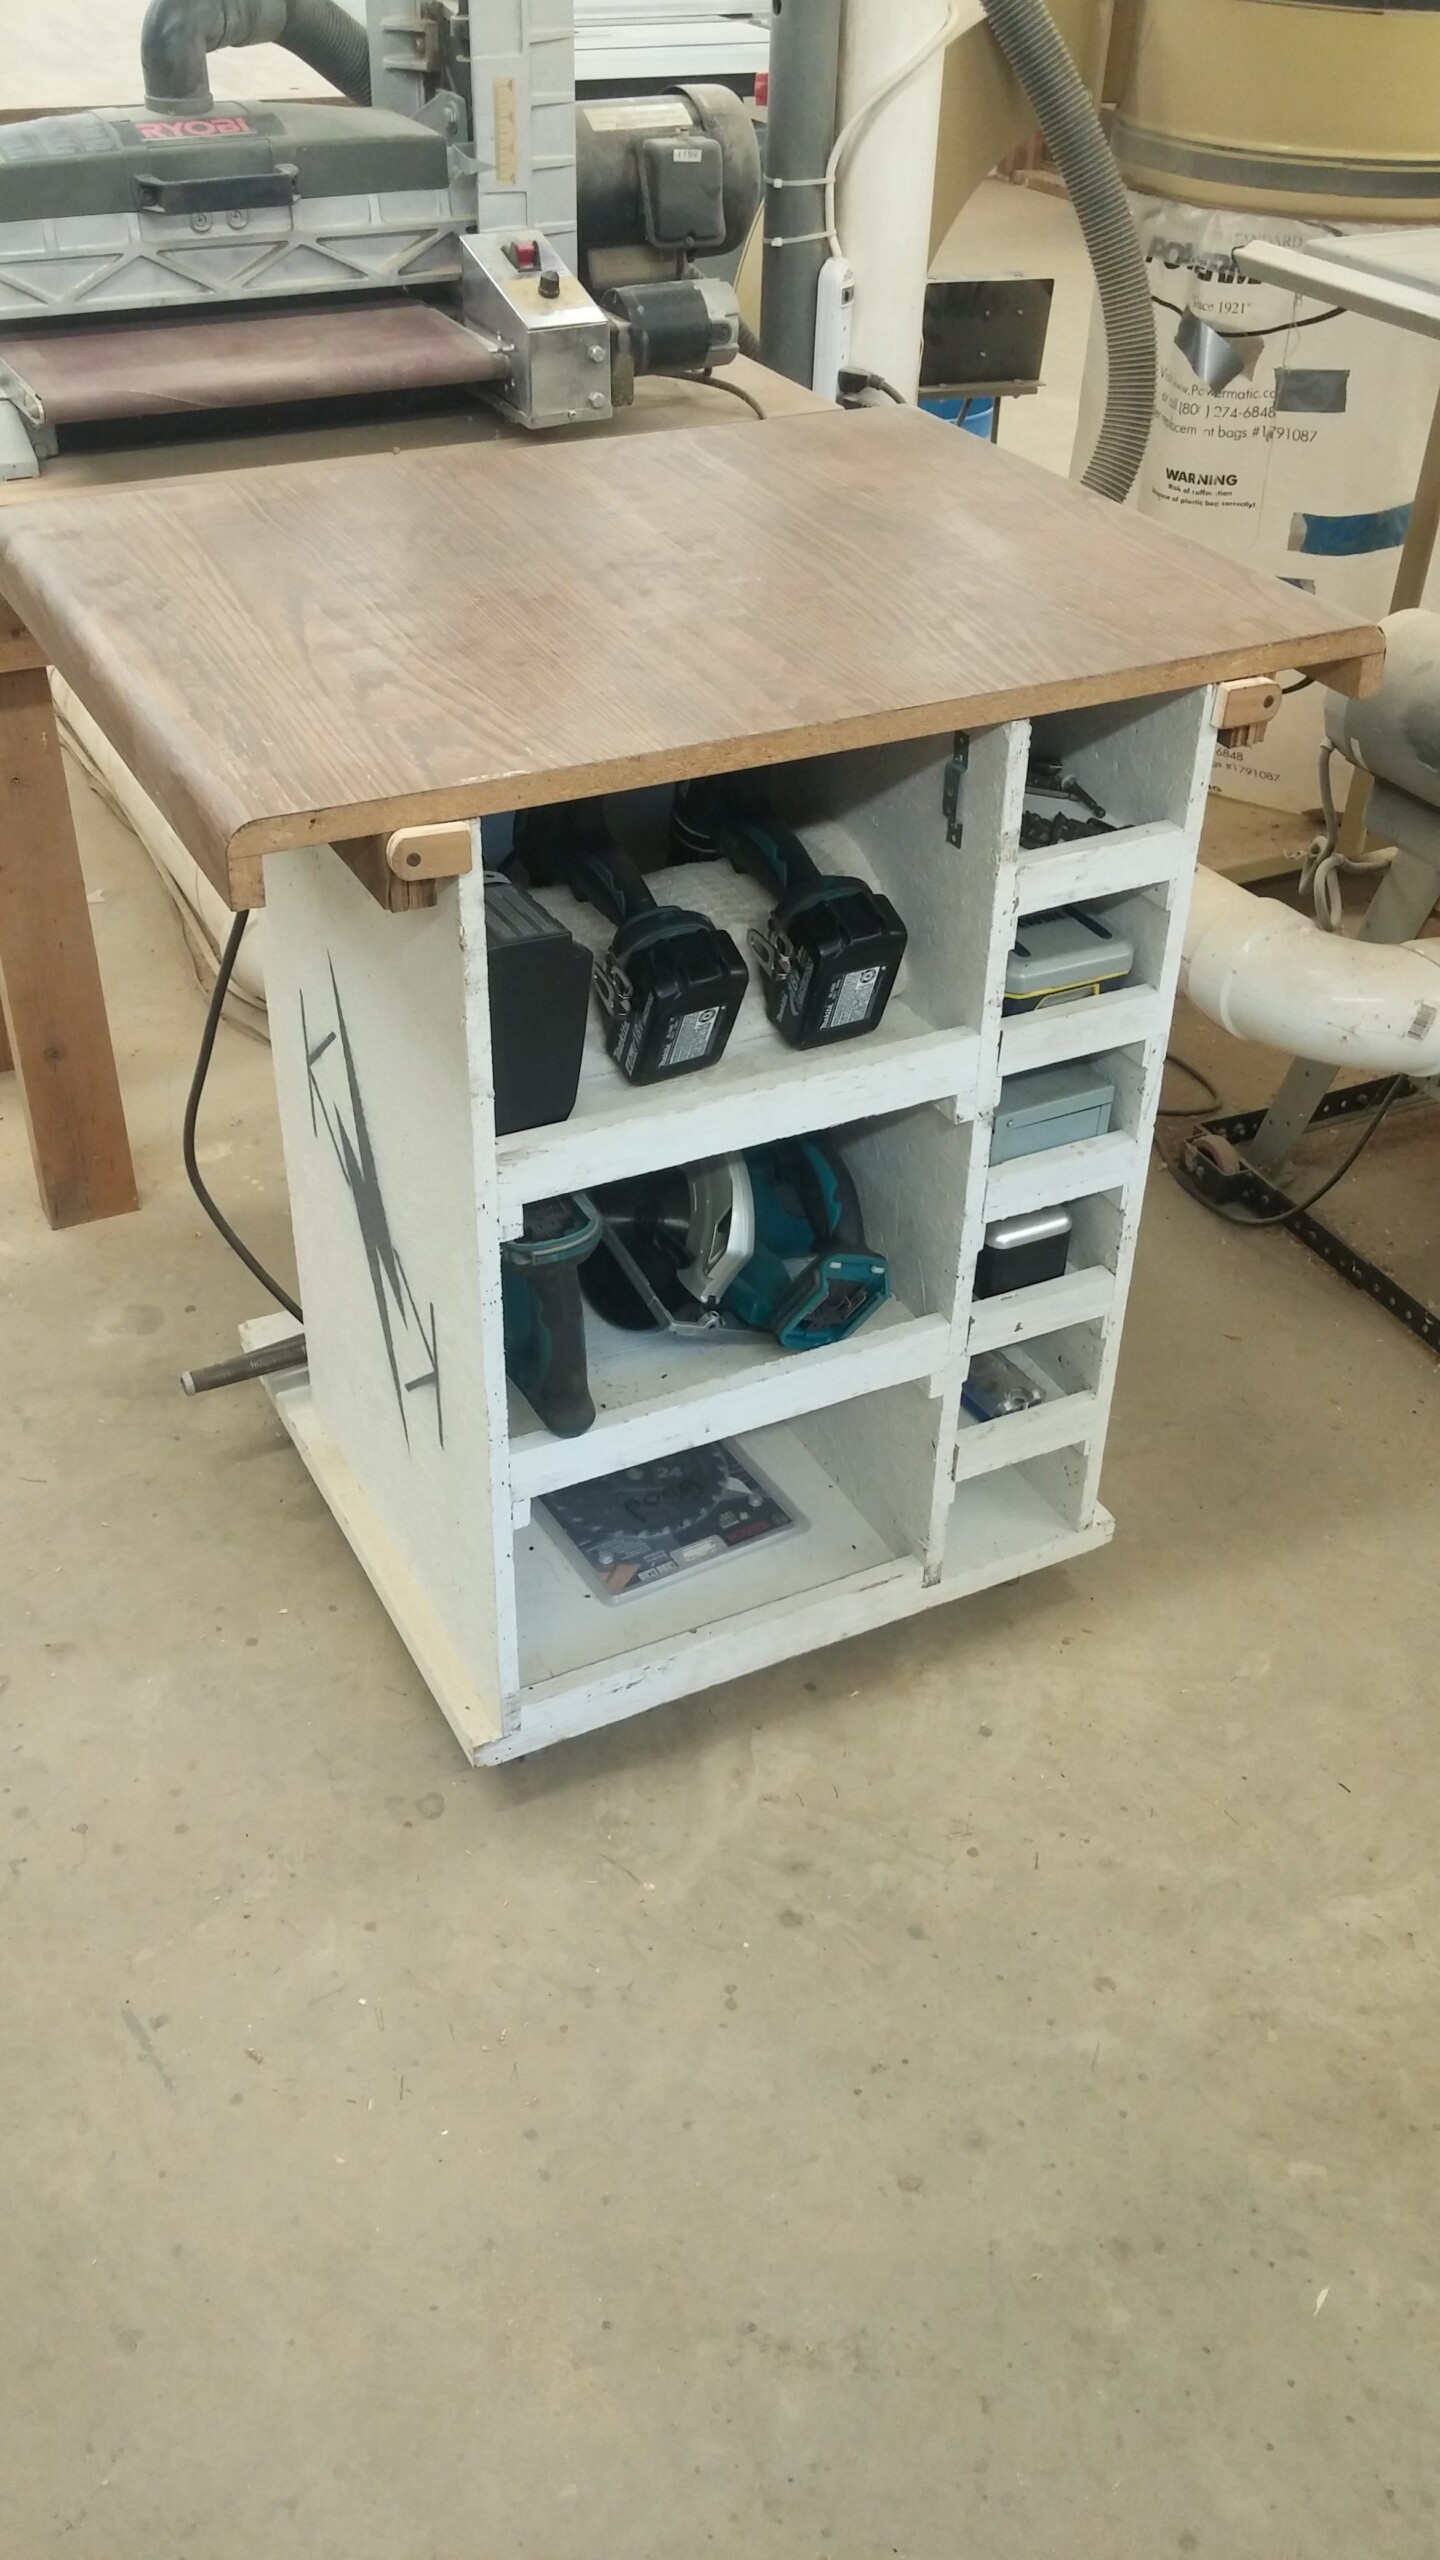
I’m a little more protective of my cordless tools, although. So I built a quick access mobile tool cart to house them all. My drill, impactor, circular saw and sawzall are always readily accessible. Accompanying this suite are all my drill bits and drills housed in open faced drawers for easy access.
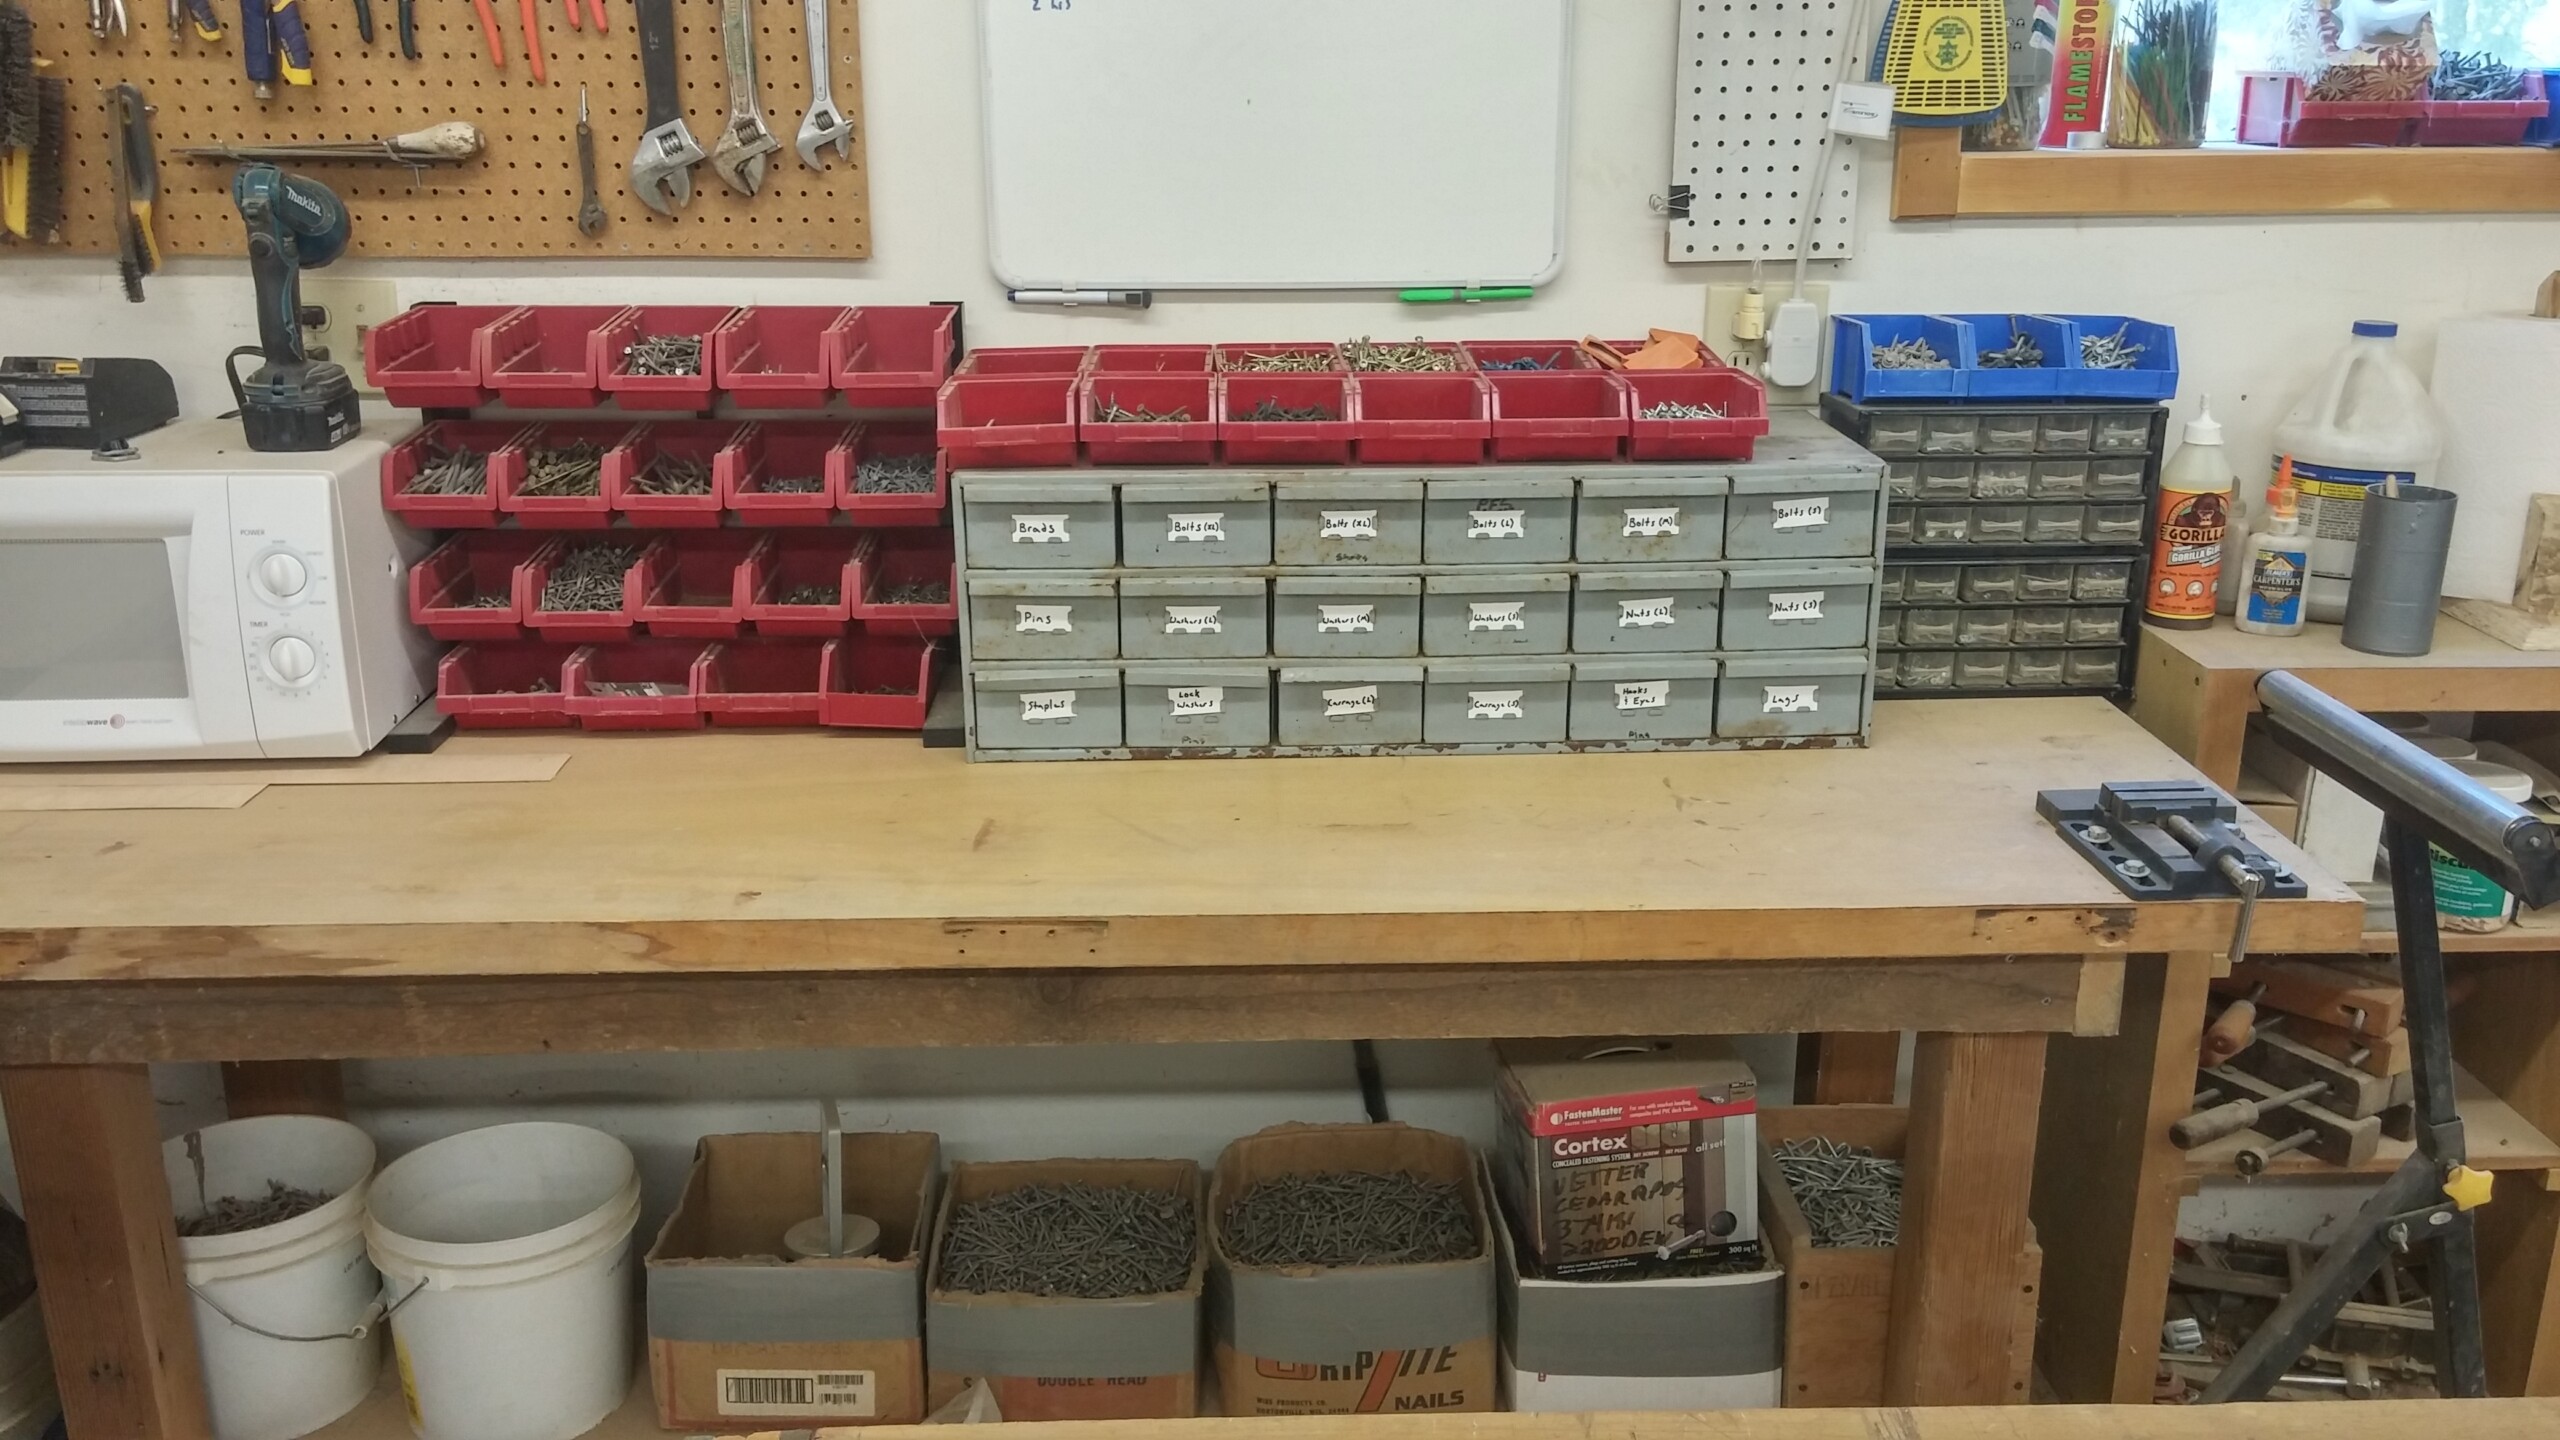
- HAVE A NICE ORGANIZED COLLECTION OF FASTENERS AND HARDWARE: I keep mine next to my main work bench, right where I need them most.
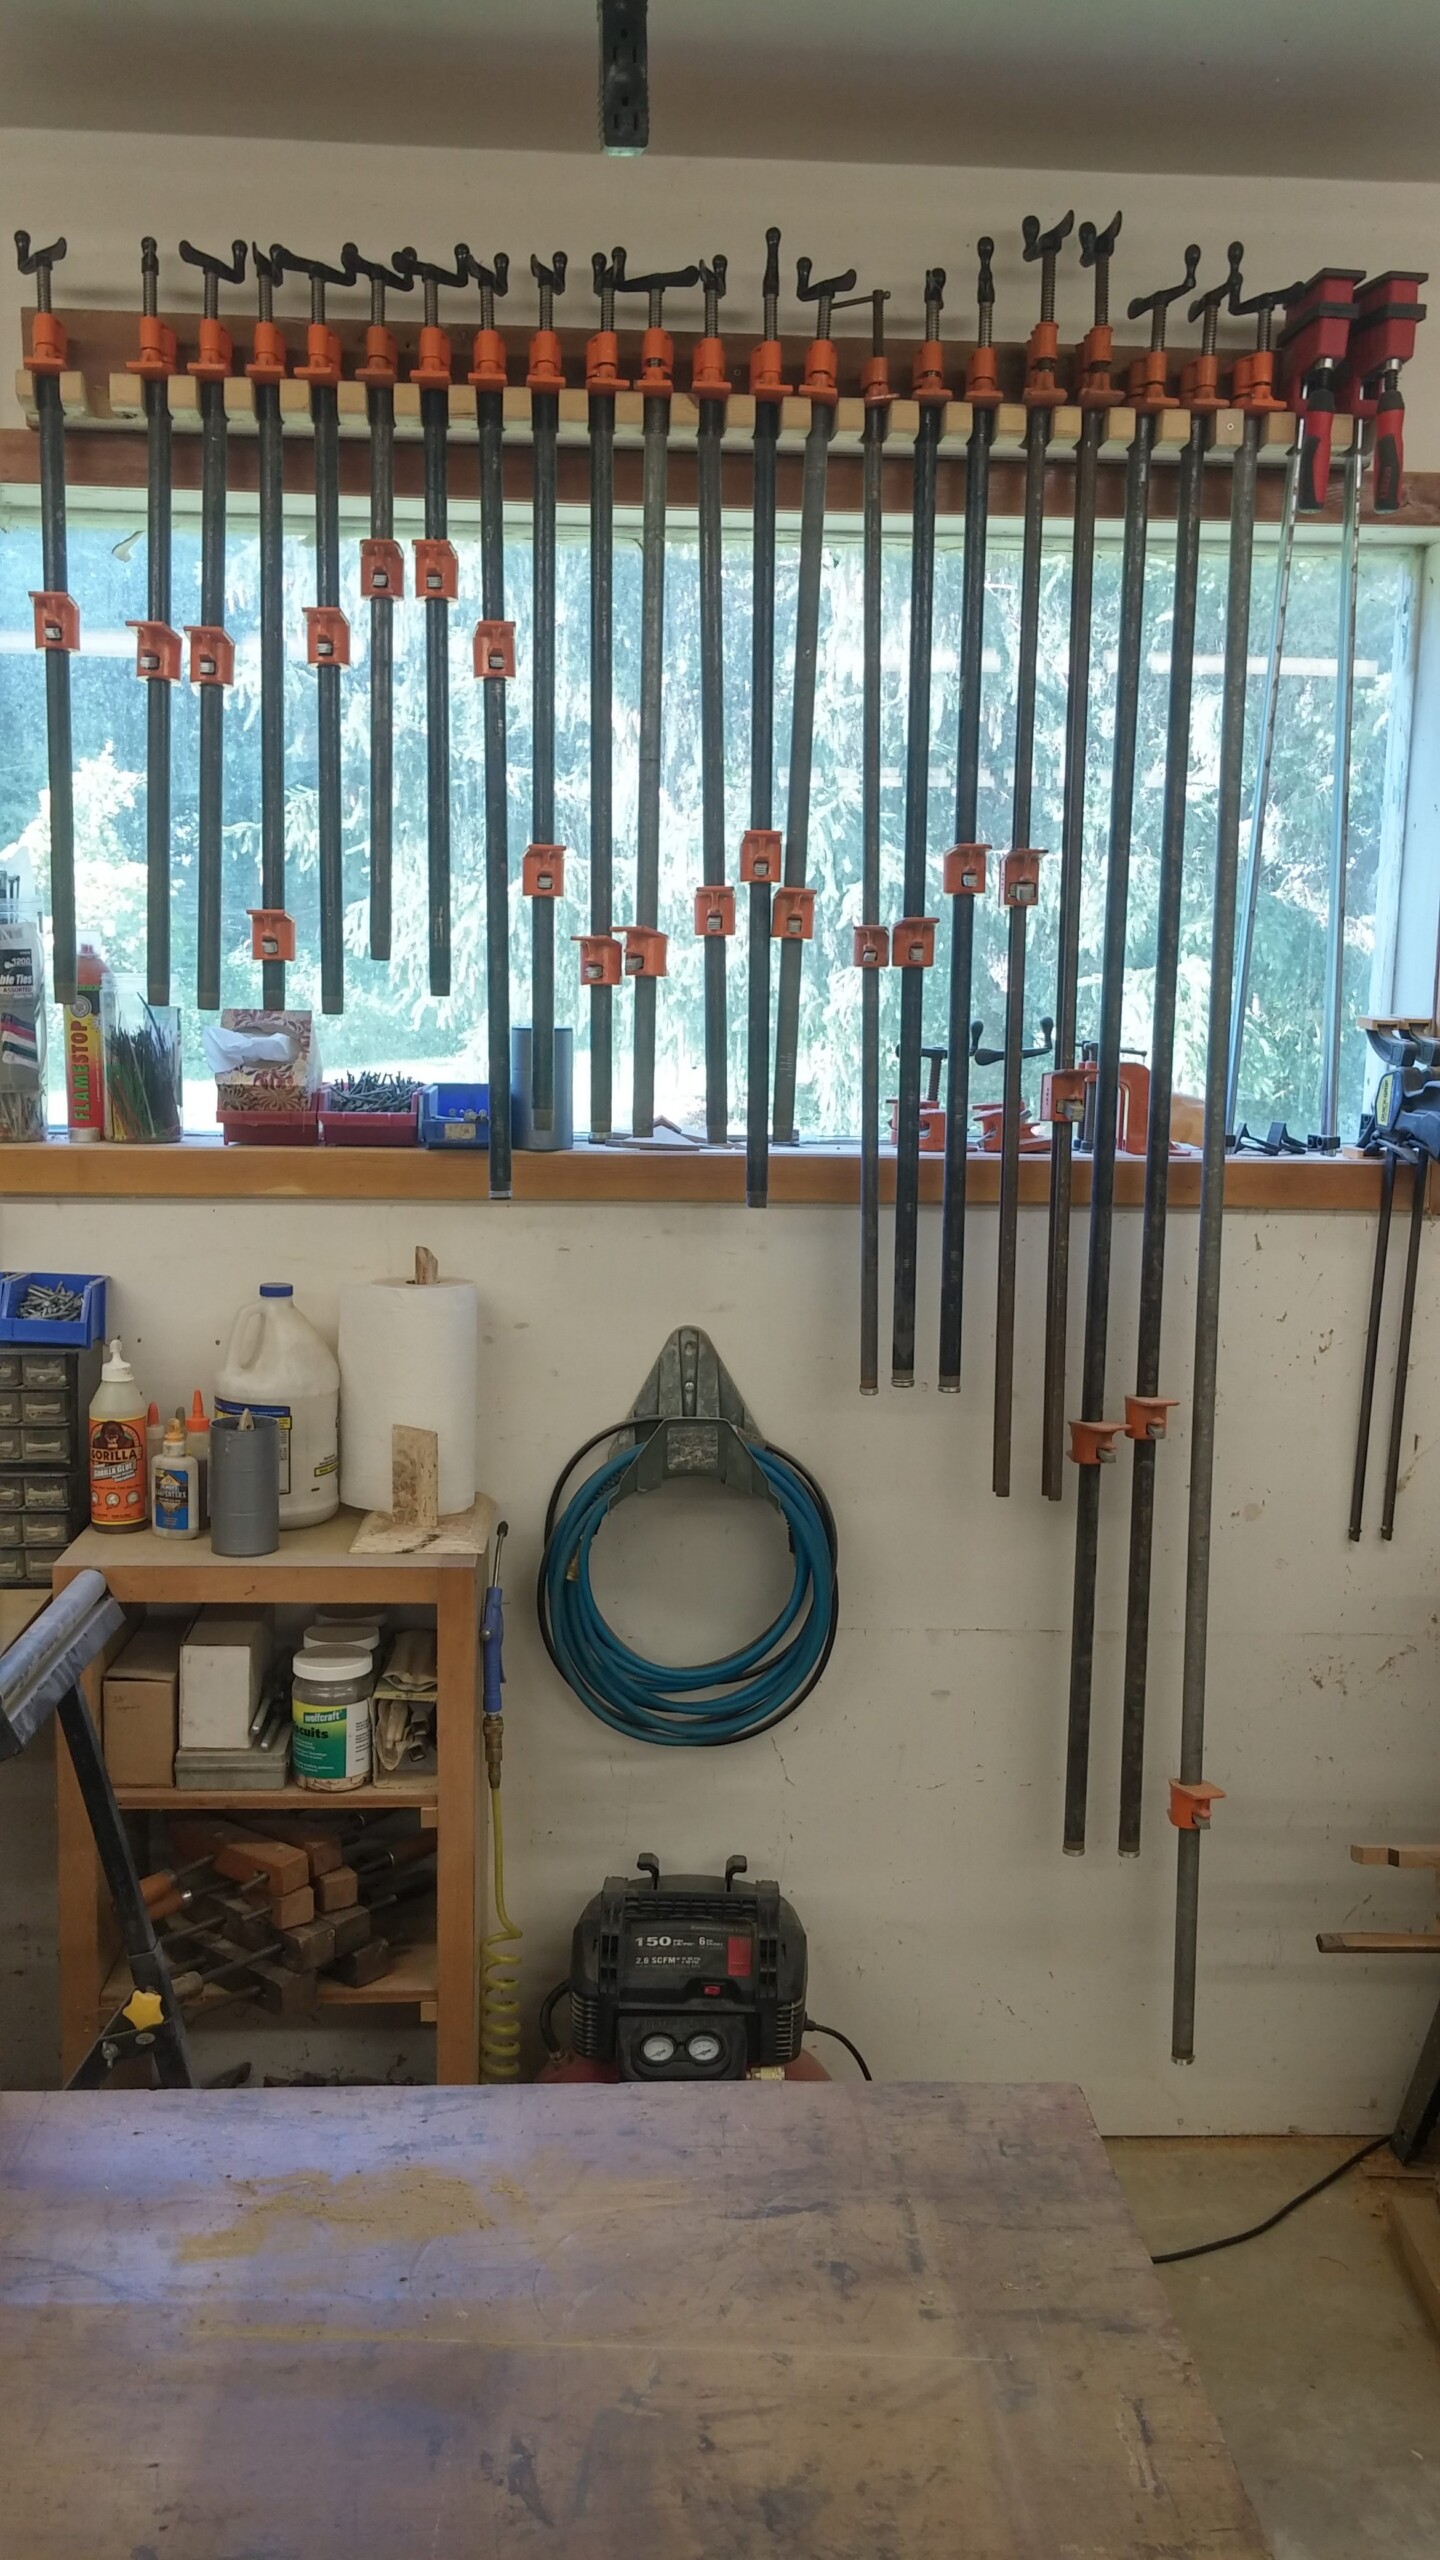
- HAVE AND EXTENSIVE COLLECTION OF CLAMPS: You can never have too many clamps. I hang mine on a rack near the work bench. I DON’T even bother closing them when I put them away, I’m just going to open them again anyway.
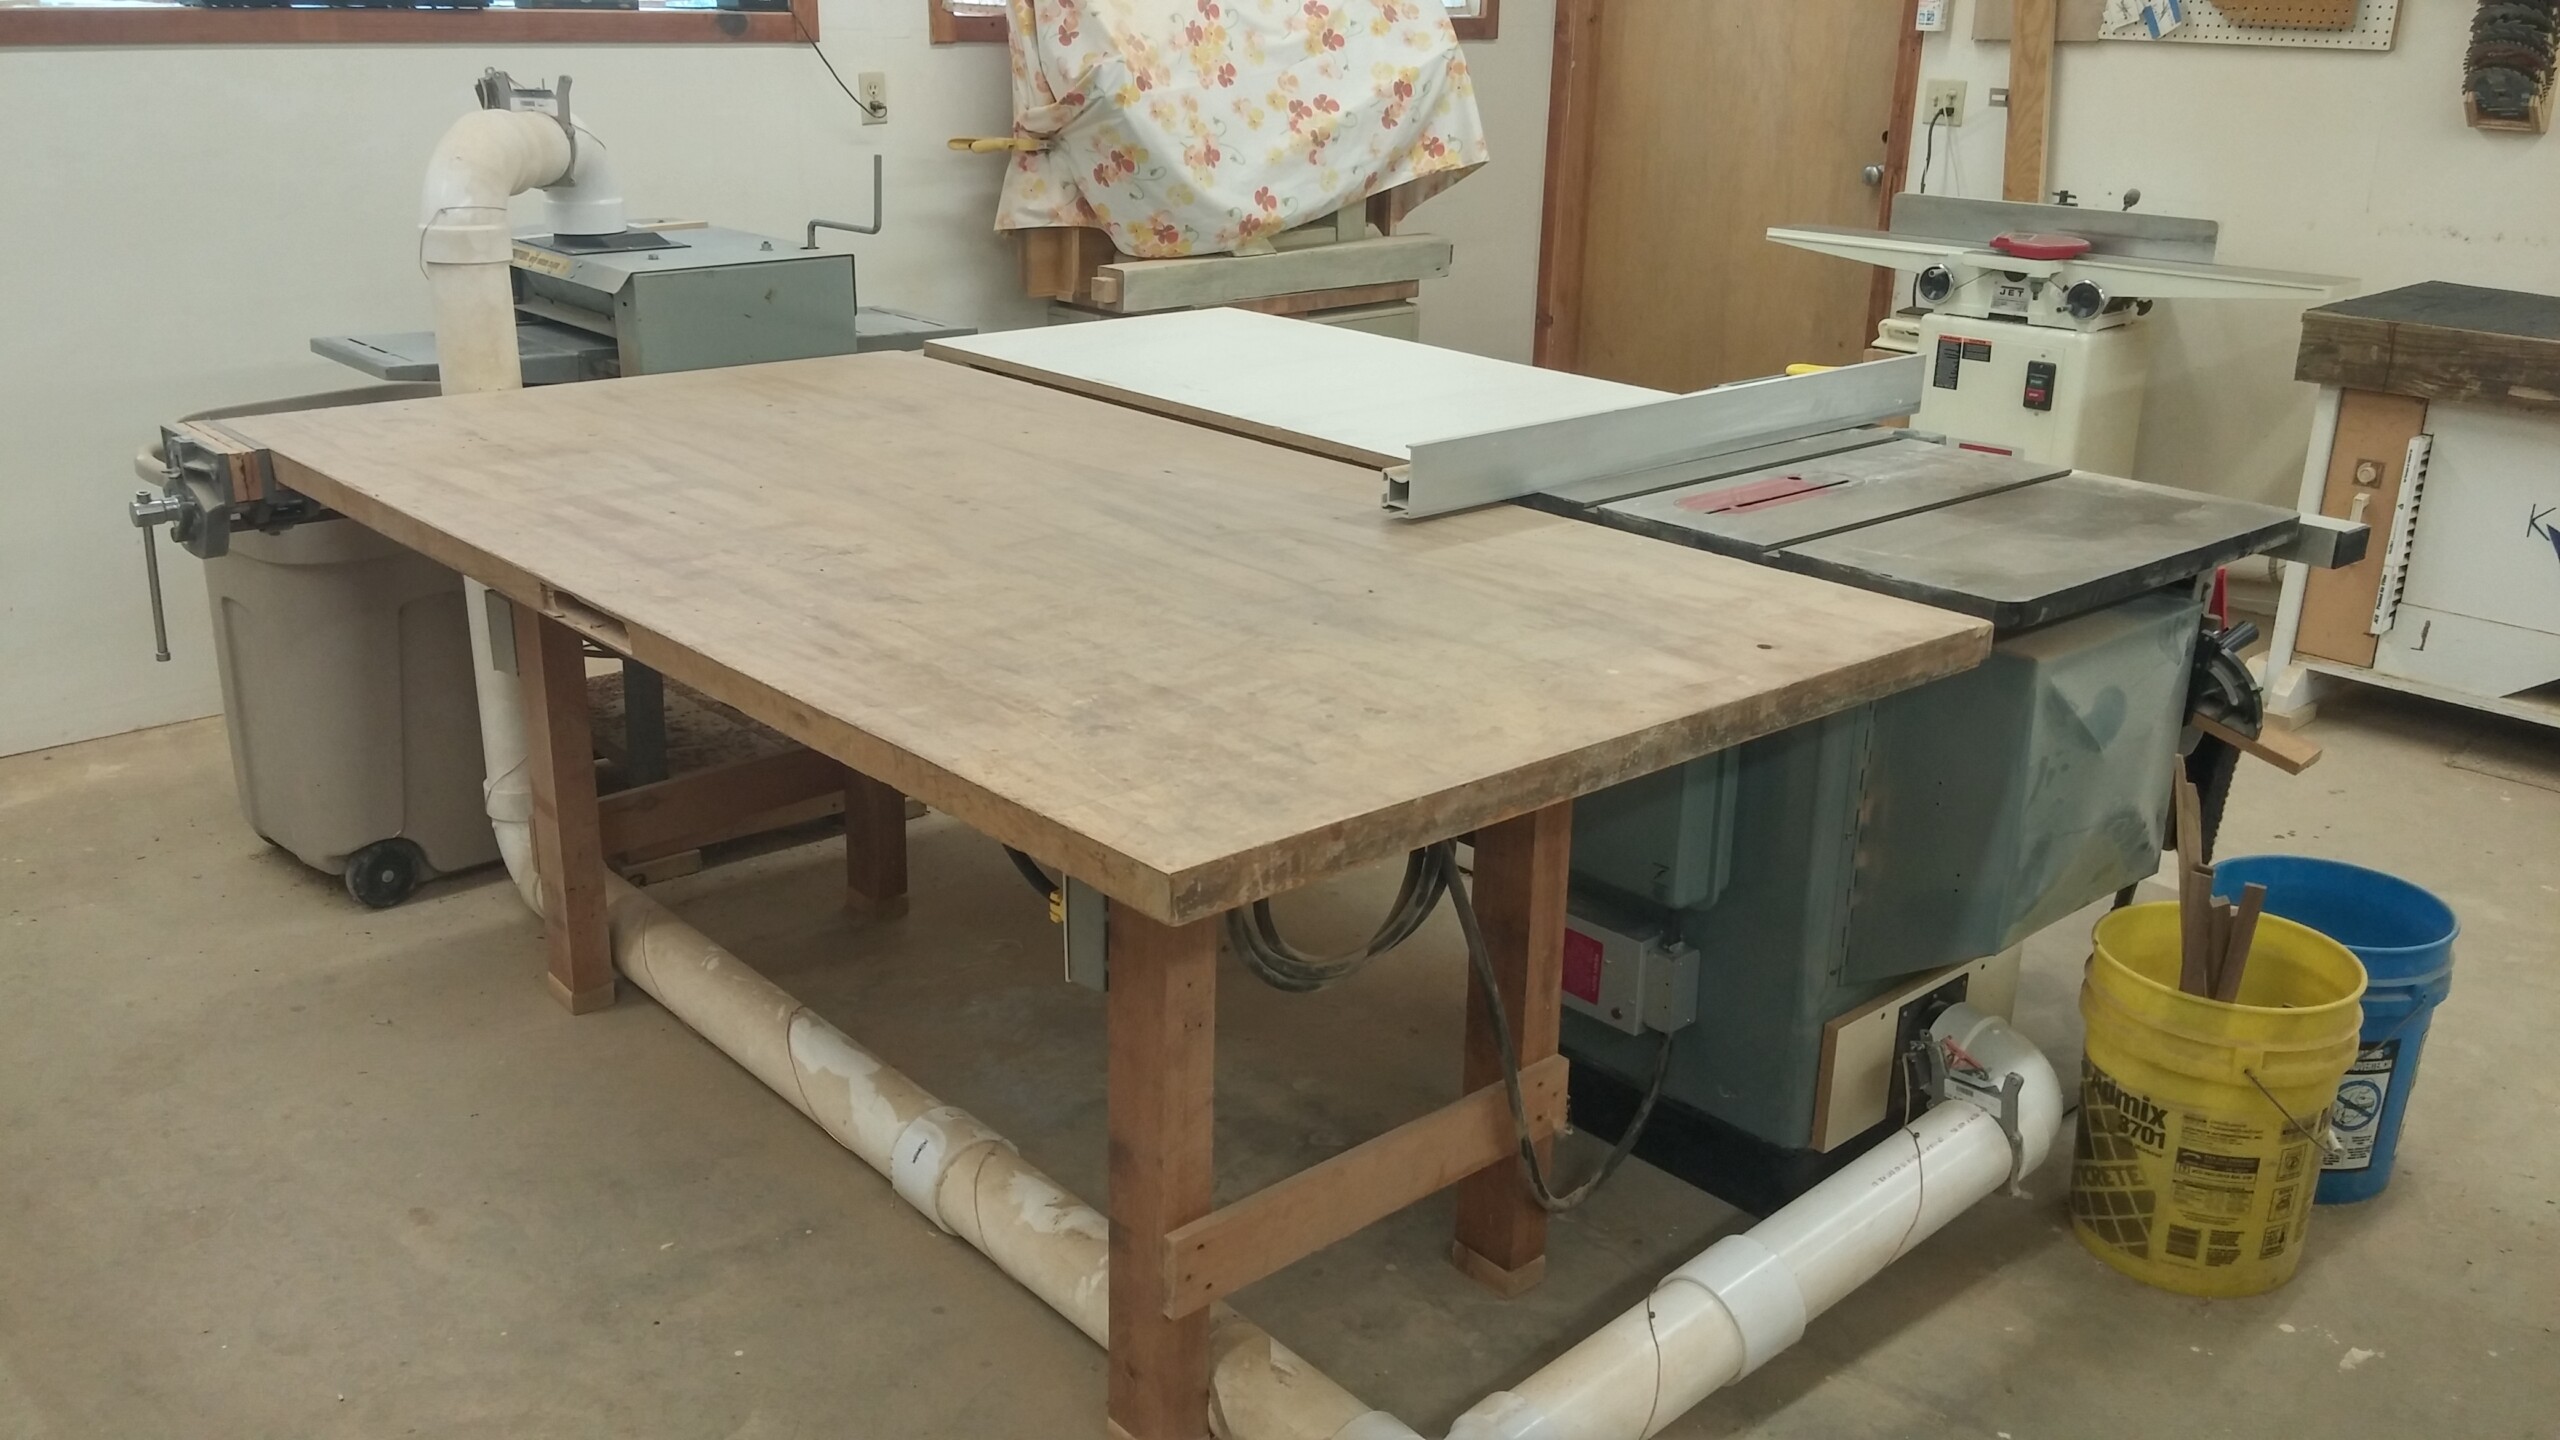
- HAVE A LARGE OUTFEED TABLE: It comes in handy more than you would imagine… i.e. for catching extra large boards off the table saw, for gluing up large projects , for an extra elevated work bench… All in all it is just nice to have an extra solid space to set things on.
- HAVE STATIONS FOR TOOLS YOU DON’T USE AS OFTEN: Tools that I don’t use as often are relegated to the farther reaches of my shop. Yet they are still easily accessible and offer solid stations from which to work off.

- THE OLD STANDBYS: You’ve heard these a few times, I hope, because they are worth repeating:
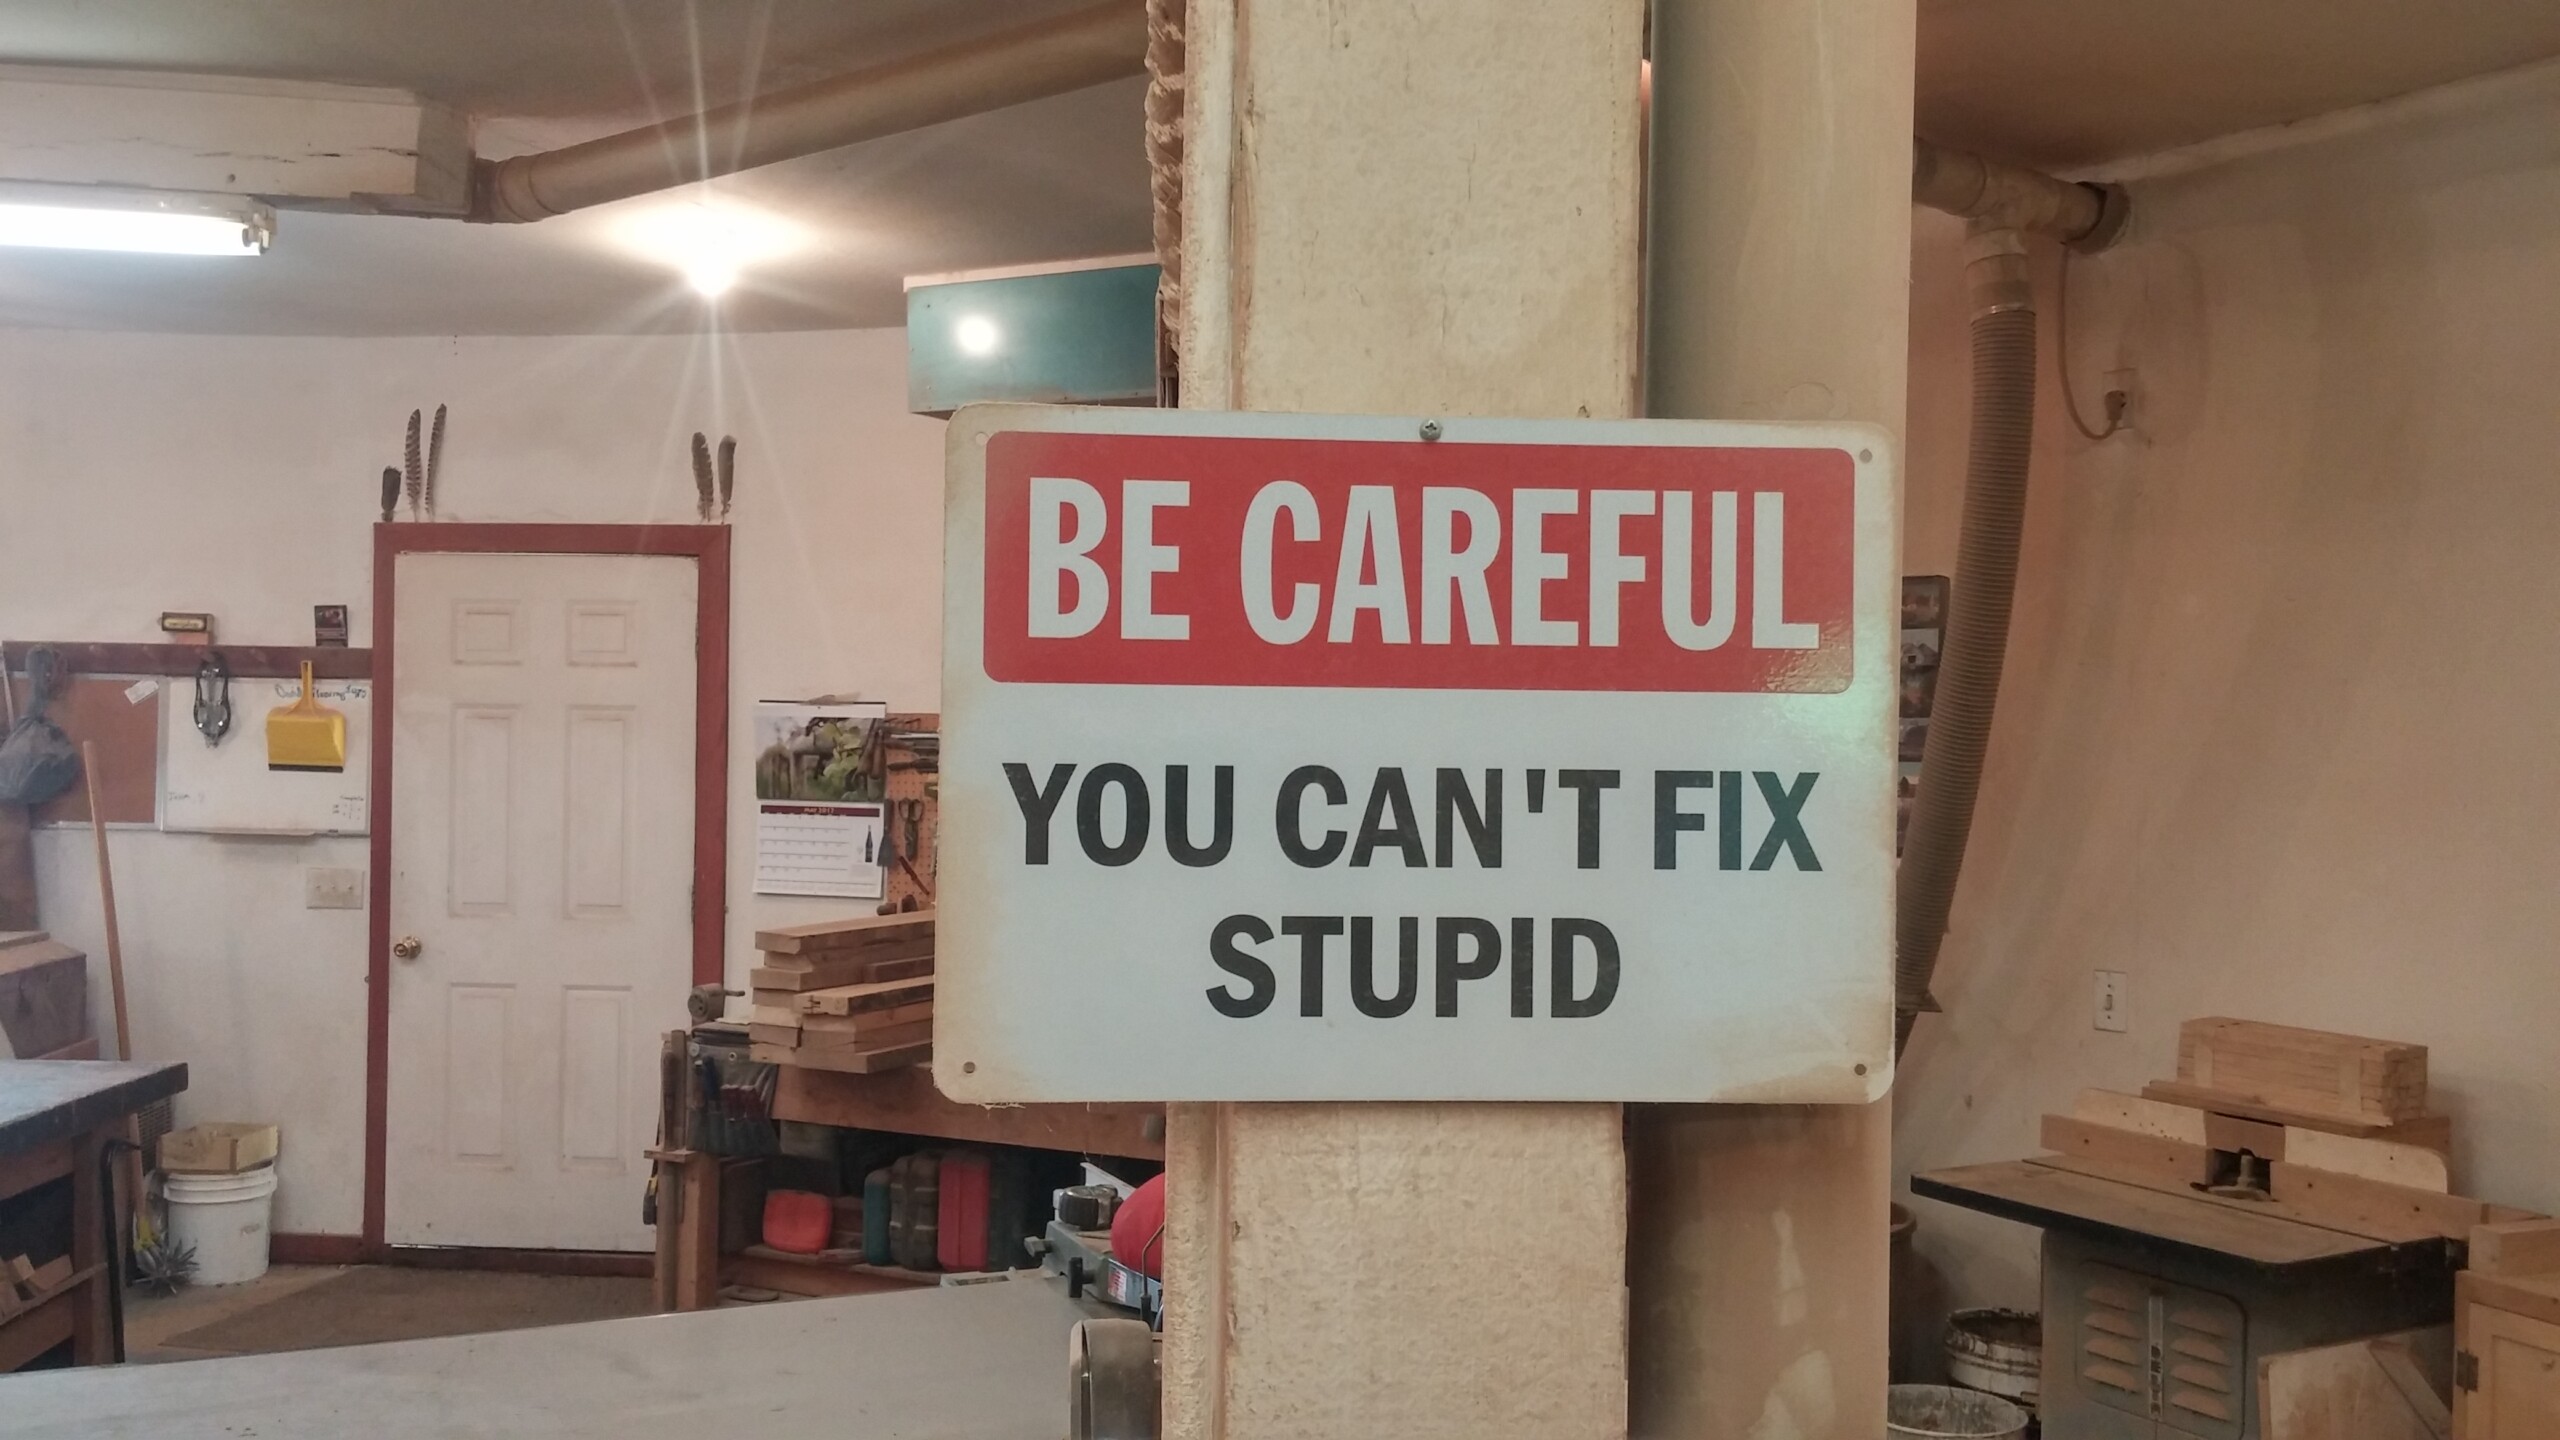
- Safety is paramount, so be careful, you cant fix stupid!
- Measure twice cut once
- Keep your blades sharp and your wits sharper
- A clean shop is a safe shop… but an OVERLY clean shop is just no fun
- Practice makes perfect
- Have patience, slow down, and enjoy what you create